 搭建Fisco的联盟链(WeBase版)
# 搭建Fisco的联盟链
# Fisco的基础环境
# 更换Ubuntu的源
root@ubuntu-farbic-1:~# vim /etc/apt/sources.list
# 注释掉原来的内容,换成以下内容,注意根据Ubuntu版本匹配,以下内容适用于Ubuntu20.04
# 添加阿里源
deb http://mirrors.aliyun.com/ubuntu/ focal main restricted universe multiverse
deb-src http://mirrors.aliyun.com/ubuntu/ focal main restricted universe multiverse
deb http://mirrors.aliyun.com/ubuntu/ focal-security main restricted universe multiverse
deb-src http://mirrors.aliyun.com/ubuntu/ focal-security main restricted universe multiverse
deb http://mirrors.aliyun.com/ubuntu/ focal-updates main restricted universe multiverse
deb-src http://mirrors.aliyun.com/ubuntu/ focal-updates main restricted universe multiverse
deb http://mirrors.aliyun.com/ubuntu/ focal-proposed main restricted universe multiverse
deb-src http://mirrors.aliyun.com/ubuntu/ focal-proposed main restricted universe multiverse
deb http://mirrors.aliyun.com/ubuntu/ focal-backports main restricted universe multiverse
deb-src http://mirrors.aliyun.com/ubuntu/ focal-backports main restricted universe multiverse
# 添加清华源
deb https://mirrors.tuna.tsinghua.edu.cn/ubuntu/ focal main restricted universe multiverse
# deb-src https://mirrors.tuna.tsinghua.edu.cn/ubuntu/ focal main restricted universe multiverse
deb https://mirrors.tuna.tsinghua.edu.cn/ubuntu/ focal-updates main restricted universe multiverse
# deb-src https://mirrors.tuna.tsinghua.edu.cn/ubuntu/ focal-updates main restricted universe multiverse
deb https://mirrors.tuna.tsinghua.edu.cn/ubuntu/ focal-backports main restricted universe multiverse
# deb-src https://mirrors.tuna.tsinghua.edu.cn/ubuntu/ focal-backports main restricted universe multiverse
deb https://mirrors.tuna.tsinghua.edu.cn/ubuntu/ focal-security main restricted universe multiverse
# deb-src https://mirrors.tuna.tsinghua.edu.cn/ubuntu/ focal-security main restricted universe multiverse multiverse


# 更新软件包
root@ubuntu-farbic-1:~# apt update
root@ubuntu-farbic-1:~# apt upgrade
# 环境安装Java
# 安装默认Java版本(Java 8或以上)
root@ubuntu-farbic-1:~# sudo apt install -y default-jdk

root@ubuntu-farbic-1:~# vim /etc/profile
export JAVA_HOME=/usr/lib/jvm/java-11-openjdk-amd64
export JRE_HOME=${JAVA_HOME}/jre
export CLASSPATH=.:${JAVA_HOME}/lib:${JRE_HOME}/lib
export PATH=${JAVA_HOME}/bin:${JRE_HOME}/bin:$PATH

# 查询Java版本
root@ubuntu-farbic-1:~# java -version
openjdk version "11.0.15" 2022-04-19
OpenJDK Runtime Environment (build 11.0.15+10-Ubuntu-0ubuntu0.20.04.1)
OpenJDK 64-Bit Server VM (build 11.0.15+10-Ubuntu-0ubuntu0.20.04.1, mixed mode, sharing)
# 安装配置数据库
需要安装MySQL5.6以上或者是Mariadb5.6以上,这里使用的是maraidb数据库。
安装完成后需要新建数据库名称和数据库的的访问用户和密码,配置清单在Fisco的部署配置文件中。
root@ubuntu-farbic-2:~# apt install -y mariadb-server
root@ubuntu-farbic-1:~# mysql_secure_installation

NOTE: RUNNING ALL PARTS OF THIS SCRIPT IS RECOMMENDED FOR ALL MariaDB
      SERVERS IN PRODUCTION USE!  PLEASE READ EACH STEP CAREFULLY!

In order to log into MariaDB to secure it, we'll need the current
password for the root user.  If you've just installed MariaDB, and
you haven't set the root password yet, the password will be blank,
so you should just press enter here.

Enter current password for root (enter for none):
OK, successfully used password, moving on...

Setting the root password ensures that nobody can log into the MariaDB
root user without the proper authorisation.

Set root password? [Y/n]
New password:
Re-enter new password:
Password updated successfully!
Reloading privilege tables..
 ... Success!


By default, a MariaDB installation has an anonymous user, allowing anyone
to log into MariaDB without having to have a user account created for
them.  This is intended only for testing, and to make the installation
go a bit smoother.  You should remove them before moving into a
production environment.

Remove anonymous users? [Y/n] y
 ... Success!

Normally, root should only be allowed to connect from 'localhost'.  This
ensures that someone cannot guess at the root password from the network.

Disallow root login remotely? [Y/n] y
 ... Success!

By default, MariaDB comes with a database named 'test' that anyone can
access.  This is also intended only for testing, and should be removed
before moving into a production environment.

Remove test database and access to it? [Y/n]
 - Dropping test database...
 ... Success!
 - Removing privileges on test database...
 ... Success!

Reloading the privilege tables will ensure that all changes made so far
will take effect immediately.

Reload privilege tables now? [Y/n]
 ... Success!

Cleaning up...

All done!  If you've completed all of the above steps, your MariaDB
installation should now be secure.

Thanks for using MariaDB!
完全卸载MySQL的方法:
sudo apt purge mysql-*
sudo rm -rf /etc/mysql/ /var/lib/mysql
sudo apt autoremove
sudo apt autoclean
# 安装配置Python环境
在Ubuntu的20.04的版本中,默认的Python环境是python3的版本。
# 这是安装Python的环境
root@ubuntu-farbic-1:~# sudo apt-get install -y python3.6
root@ubuntu-farbic-1:~# sudo apt-get install -y python3-pip

# 这是配置Python的依赖
root@ubuntu-farbic-1:~# sudo apt-get install -y python3-pip
root@ubuntu-farbic-1:~# sudo pip3 install PyMySQL
root@ubuntu-farbic-1:~# pip3 install PyMySQL
Collecting PyMySQL
  Downloading PyMySQL-1.0.2-py3-none-any.whl (43 kB)
     |████████████████████████████████| 43 kB 624 kB/s
Installing collected packages: PyMySQL
Successfully installed PyMySQL-1.0.2
# 部署WeBASE管理平台
# 拉取部署脚本
# 新建一个目录
root@ubuntu-farbic-1:~# mkdir fisco && cd fisco
# 获取部署的包
root@ubuntu-farbic-1:~/fisco# wget https://osp-1257653870.cos.ap-guangzhou.myqcloud.com/WeBASE/releases/download/v1.5.4/webase-deploy.zip
# 解压部署压缩包
root@ubuntu-farbic-1:~/fisco# unzip webase-deploy.zip
# 进入目录
root@ubuntu-farbic-1:~/fisco# cd webase-deploy/
# 配置文件介绍
① mysql数据库需提前安装,已安装直接配置即可,还未安装请参看数据库部署 (opens new window);
② 修改配置文件(vi common.properties);
- 若使用可视化部署,则忽略下文,将修改
visual-deploy.properties,并进行可视化部署依赖服务的一键安装,具体请参考可视化部署-一键安装依赖服务 (opens new window)
③ 一键部署支持使用已有链或者搭建新链。通过参数”if.exist.fisco”配置是否使用已有链,以下配置二选一即可:
- 当配置”yes”时,需配置已有链的路径
fisco.dir。路径下要存在sdk目录,sdk目录中包含ca.crt, sdk.crt, sdk.key及gm目录,gm目录中包含国密SSL所需证书,包含gmca.crt、gmsdk.crt、gmsdk.key、gmensdk.crt和gmensdk.key - 当配置”no”时,需配置节点fisco版本和节点安装个数,搭建的新链默认两个群组
④ 服务端口不能小于1024
⑤ 部署时,修改 common.properties 配置文件
注:使用国密版需要修改设置配置项
encrypt.type=1。前置SDK与节点默认使用非国密SSL,如果需要使用国密SSL,需要修改设置配置项encrypt.sslType=1。
root@ubuntu-farbic-1:~/fisco/webase-deploy# cat common.properties
# WeBASE子系统的最新版本(v1.1.0或以上版本)
webase.web.version=v1.5.4
webase.mgr.version=v1.5.4
webase.sign.version=v1.5.3
webase.front.version=v1.5.4

#####################################################################
## 使用Docker启用Mysql服务,则需要配置以下值

# 1: enable mysql in docker
# 0: mysql run in host, required fill in the configuration of webase-node-mgr and webase-sign
docker.mysql=1

# if [docker.mysql=1], mysql run in host (only works in [installDockerAll])
# run mysql 5.6 by docker
docker.mysql.port=23306
# default user [root]
docker.mysql.password=123456

#####################################################################
## 不使用Docker启动Mysql,则需要配置以下值

# 节点管理子系统mysql数据库配置
mysql.ip=192.168.100.168
mysql.port=3306
mysql.user=root
mysql.password=000000
mysql.database=webasenodemanager

# 签名服务子系统mysql数据库配置
sign.mysql.ip=192.168.100.168
sign.mysql.port=3306
sign.mysql.user=root
sign.mysql.password=000000
sign.mysql.database=webasesign


# 节点前置子系统h2数据库名和所属机构
front.h2.name=webasefront
front.org=fisco

# WeBASE管理平台服务端口
web.port=5000
# 启用移动端管理平台 (0: disable, 1: enable)
web.h5.enable=1

# 节点管理子系统服务端口
mgr.port=5001
# 节点前置子系统端口
front.port=5002
# 签名服务子系统端口
sign.port=5004


# 节点监听Ip
node.listenIp=127.0.0.1
# 节点p2p端口
node.p2pPort=30300
# 节点链上链下端口
node.channelPort=20200
# 节点rpc端口
node.rpcPort=8545

# 加密类型 (0: ECDSA算法, 1: 国密算法)
encrypt.type=0
# SSL连接加密类型 (0: ECDSA SSL, 1: 国密SSL)
# 只有国密链才能使用国密SSL
encrypt.sslType=0

# 是否使用已有的链(yes/no)
if.exist.fisco=no

# 使用已有链时需配置
# 已有链的路径,start_all.sh脚本所在路径
# 路径下要存在sdk目录(sdk目录中包含了SSL所需的证书,即ca.crt、sdk.crt、sdk.key和gm目录(包含国密SSL证书,gmca.crt、gmsdk.crt、gmsdk.key、gmensdk.crt和gmensdk.key)
fisco.dir=/data/app/nodes/127.0.0.1
# 前置所连接节点,在127.0.0.1目录中的节点中的一个
# 节点路径下要存在conf文件夹,conf里存放节点证书(ca.crt、node.crt和node.key)
node.dir=node0

# 搭建新链时需配置
# FISCO-BCOS版本
fisco.version=2.7.2
# 搭建节点个数(默认两个)
node.counts=nodeCounts
# 数据库配置
WeBASE需要使用到两个数据库,分别是节点管理子系统mysql数据库webasenodemanager和签名服务子系统mysql数据库webasesign。
因此,需要给WeBASE创建一个可用帐号,并把这两个数据库的权限赋予这个帐号。 (注:这两个数据库的名字可以在WeBASE配置文件中修改,这里就直接使用默认的名字。)
MariaDB [(none)]> create user 'webase'@'localhost' identified by '000000';
Query OK, 0 rows affected (0.000 sec)

MariaDB [(none)]> create database webasenodemanager;
Query OK, 1 row affected (0.000 sec)

MariaDB [(none)]> create database webasesign;
Query OK, 1 row affected (0.000 sec)

MariaDB [(none)]> grant all privileges on webasenodemanager.* to 'webase'@'localhost';
Query OK, 0 rows affected (0.000 sec)

MariaDB [(none)]> grant all privileges on webasesign.* to 'webase'@'localhost';
Query OK, 0 rows affected (0.000 sec)
# 部署
执行installAll命令,部署服务将自动部署FISCO BCOS节点,并部署 WeBASE 中间件服务,包括签名服务(sign)、节点前置(front)、节点管理服务(node-mgr)、节点管理前端(web)
备注:
- 部署脚本会拉取相关安装包进行部署,需保持网络畅通
- 首次部署需要下载编译包和初始化数据库,重复部署时可以根据提示不重复操作
- 部署过程中出现报错时,可根据错误提示进行操作,或根据本文档中的常见问题 (opens new window)进行排查
- 不要用sudo执行脚本,例如
sudo python3 deploy.py installAll(sudo会导致无法获取当前用户的环境变量如JAVA_HOME)
# 部署并启动所有服务
python3 deploy.py installAll
部署完成后可以看到deploy has completed的日志:
root@ubuntu-fisco1:~/fisco/webase-deploy# python3 deploy.py installAll
···
============================================================
              _    _     ______  ___  _____ _____
             | |  | |    | ___ \/ _ \/  ___|  ___|
             | |  | | ___| |_/ / /_\ \ `--.| |__
             | |/\| |/ _ | ___ |  _  |`--. |  __|
             \  /\  |  __| |_/ | | | /\__/ | |___
              \/  \/ \___\____/\_| |_\____/\____/
...
...
============================================================
==============      deploy  has completed     ==============
============================================================
==============    webase-web version  v1.5.4        ========
==============    webase-node-mgr version  v1.5.4   ========
==============    webase-sign version  v1.5.3       ========
==============    webase-front version  v1.5.4      ========
============================================================
服务部署后,需要对各服务进行启停操作,可以使用以下命令:
# 一键部署
部署并启动所有服务        python3 deploy.py installAll
停止一键部署的所有服务    python3 deploy.py stopAll
启动一键部署的所有服务    python3 deploy.py startAll
# 各子服务启停
启动FISCO-BCOS节点:      python3 deploy.py startNode
停止FISCO-BCOS节点:      python3 deploy.py stopNode
启动WeBASE-Web:          python3 deploy.py startWeb
停止WeBASE-Web:          python3 deploy.py stopWeb
启动WeBASE-Node-Manager: python3 deploy.py startManager
停止WeBASE-Node-Manager: python3 deploy.py stopManager
启动WeBASE-Sign:        python3 deploy.py startSign
停止WeBASE-Sign:        python3 deploy.py stopSign
启动WeBASE-Front:        python3 deploy.py startFront
停止WeBASE-Front:        python3 deploy.py stopFront
# 可视化部署
部署并启动可视化部署的所有服务  python3 deploy.py installWeBASE
停止可视化部署的所有服务  python3 deploy.py stopWeBASE
启动可视化部署的所有服务  python3 deploy.py startWeBASE
# 检查服务日志
各子服务的日志路径如下:
|-- webase-deploy # 一键部署目录
|--|-- log # 部署日志目录
|--|-- webase-web # 管理平台目录
|--|--|-- log # 管理平台日志目录
|--|-- webase-node-mgr # 节点管理服务目录
|--|--|-- log # 节点管理服务日志目录
|--|-- webase-sign # 签名服务目录
|--|--|-- log # 签名服务日志目录
|--|-- webase-front # 节点前置服务目录
|--|--|-- log # 节点前置服务日志目录
|--|-- nodes # 一件部署搭链节点目录
|--|--|-- 127.0.0.1
|--|--|--|-- node0 # 具体节点目录
|--|--|--|--|-- log # 节点日志目录
备注:当前节点日志路径为一键部署搭链的路径,使用已有链请在相关路径查看日志
日志目录中包含{XXX}.log全量日志文件和{XXX}-error.log错误日志文件
- 通过日志定位错误问题时,可以结合
.log全量日志和-error.log错误日志两种日志信息进行排查。,如查询WeBASE-Front日志,则打开WeBASE-Front-error.log可以快速找到错误信息,根据错误查看WeBASE-Front.log的相关内容,可以看到错误日志前后的普通日志信息
# 访问
WeBASE管理平台:
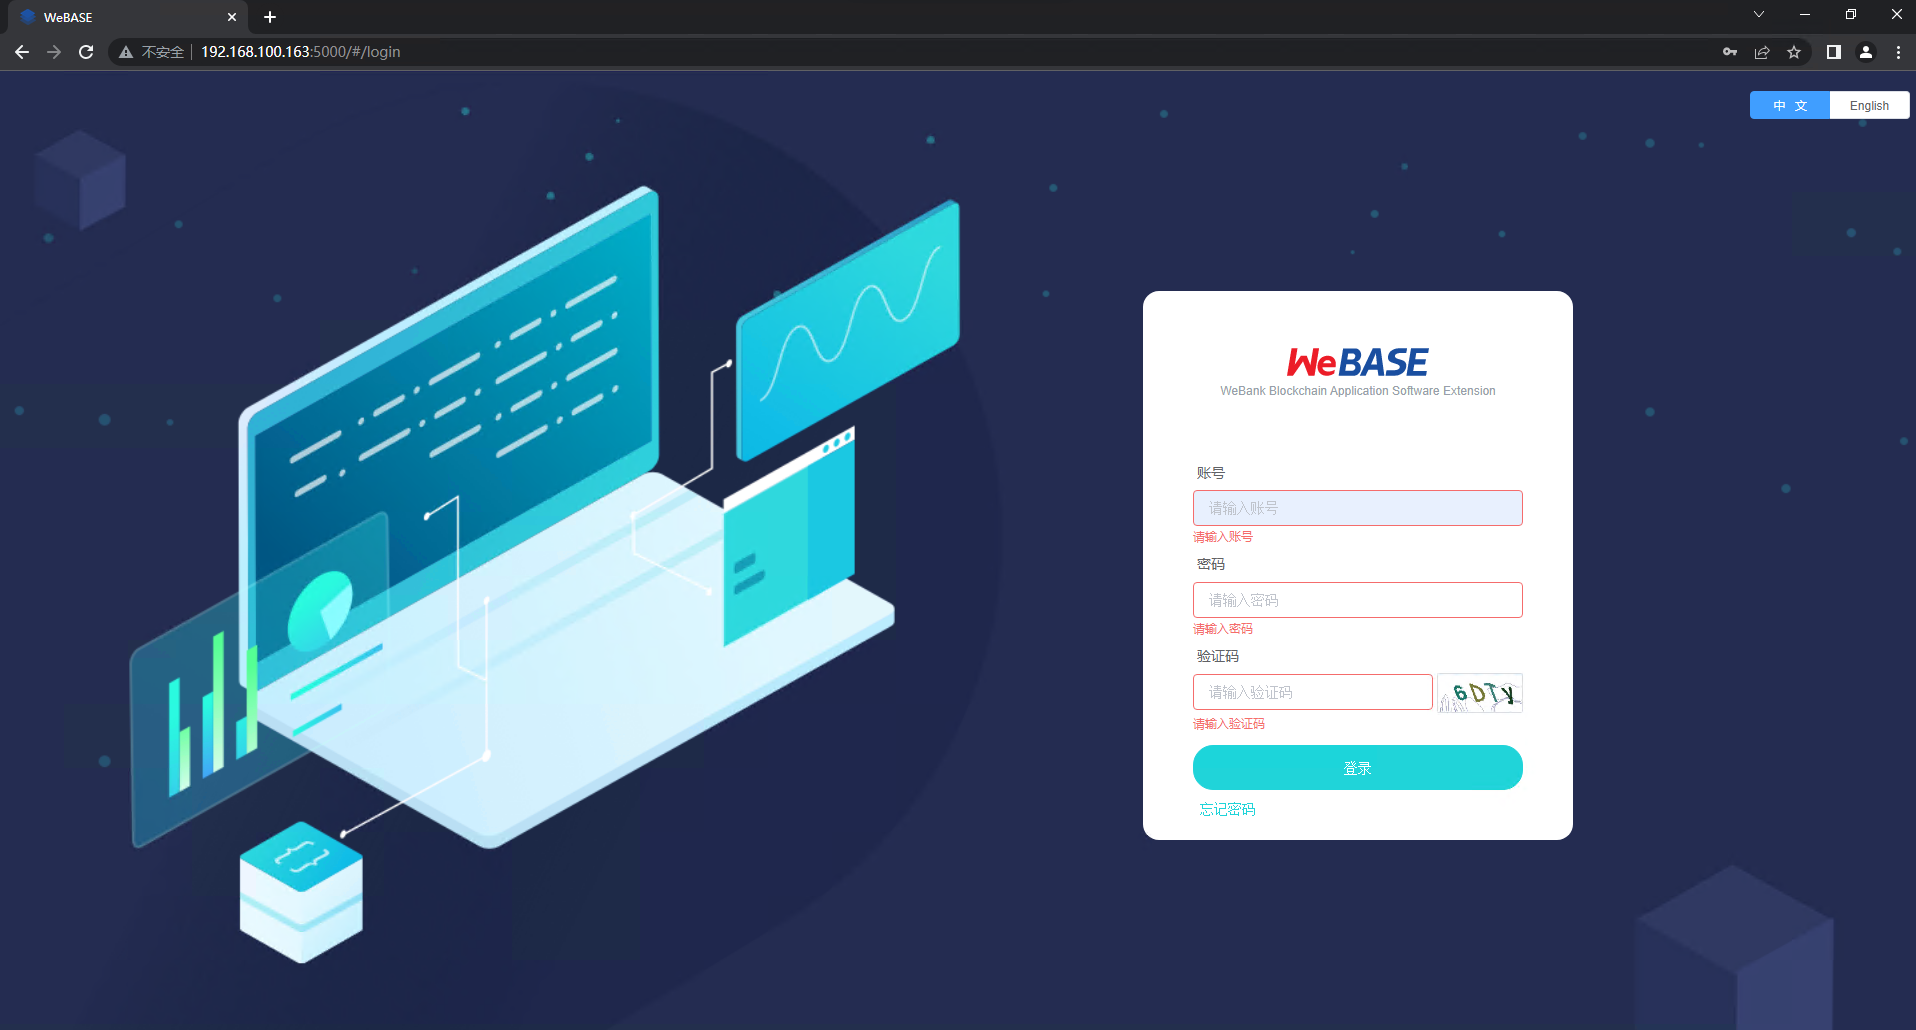
- 一键部署完成后,打开浏览器(Chrome Safari或Firefox)访问http://localhost:5000
备注:
部署服务器IP和管理平台服务端口需对应修改,网络策略需开通
- 使用云服务厂商的服务器时,需要开通网络安全组的对应端口。如开放webase使用的5000端口
WeBASE管理平台使用说明请查看
使用手册
(获取WeBASE管理平台默认账号和密码,并初始化系统配置)
- 默认账号为
admin,默认密码为Abcd1234。首次登陆要求重置密码 - 添加节点前置WeBASE-Front到WeBASE管理平台;一键部署时,节点前置与节点管理服务默认是同机部署,添加前置则填写IP为
127.0.0.1,默认端口为5002。参考上文中common.properties的配置项front.port={frontPort}
- 默认账号为
检查节点前置是否启动,可以通过访问
http://{frontIp}:{frontPort}/WeBASE-Front(默认端口5002);访问前,确保服务端已对本地机器开放端口,如开放front的5002端口。(不建议节点前置的端口对公网开放访问权限,应对部分机器IP按需开放)

# 调用HelloWorld合约
# 编写HelloWorld合约
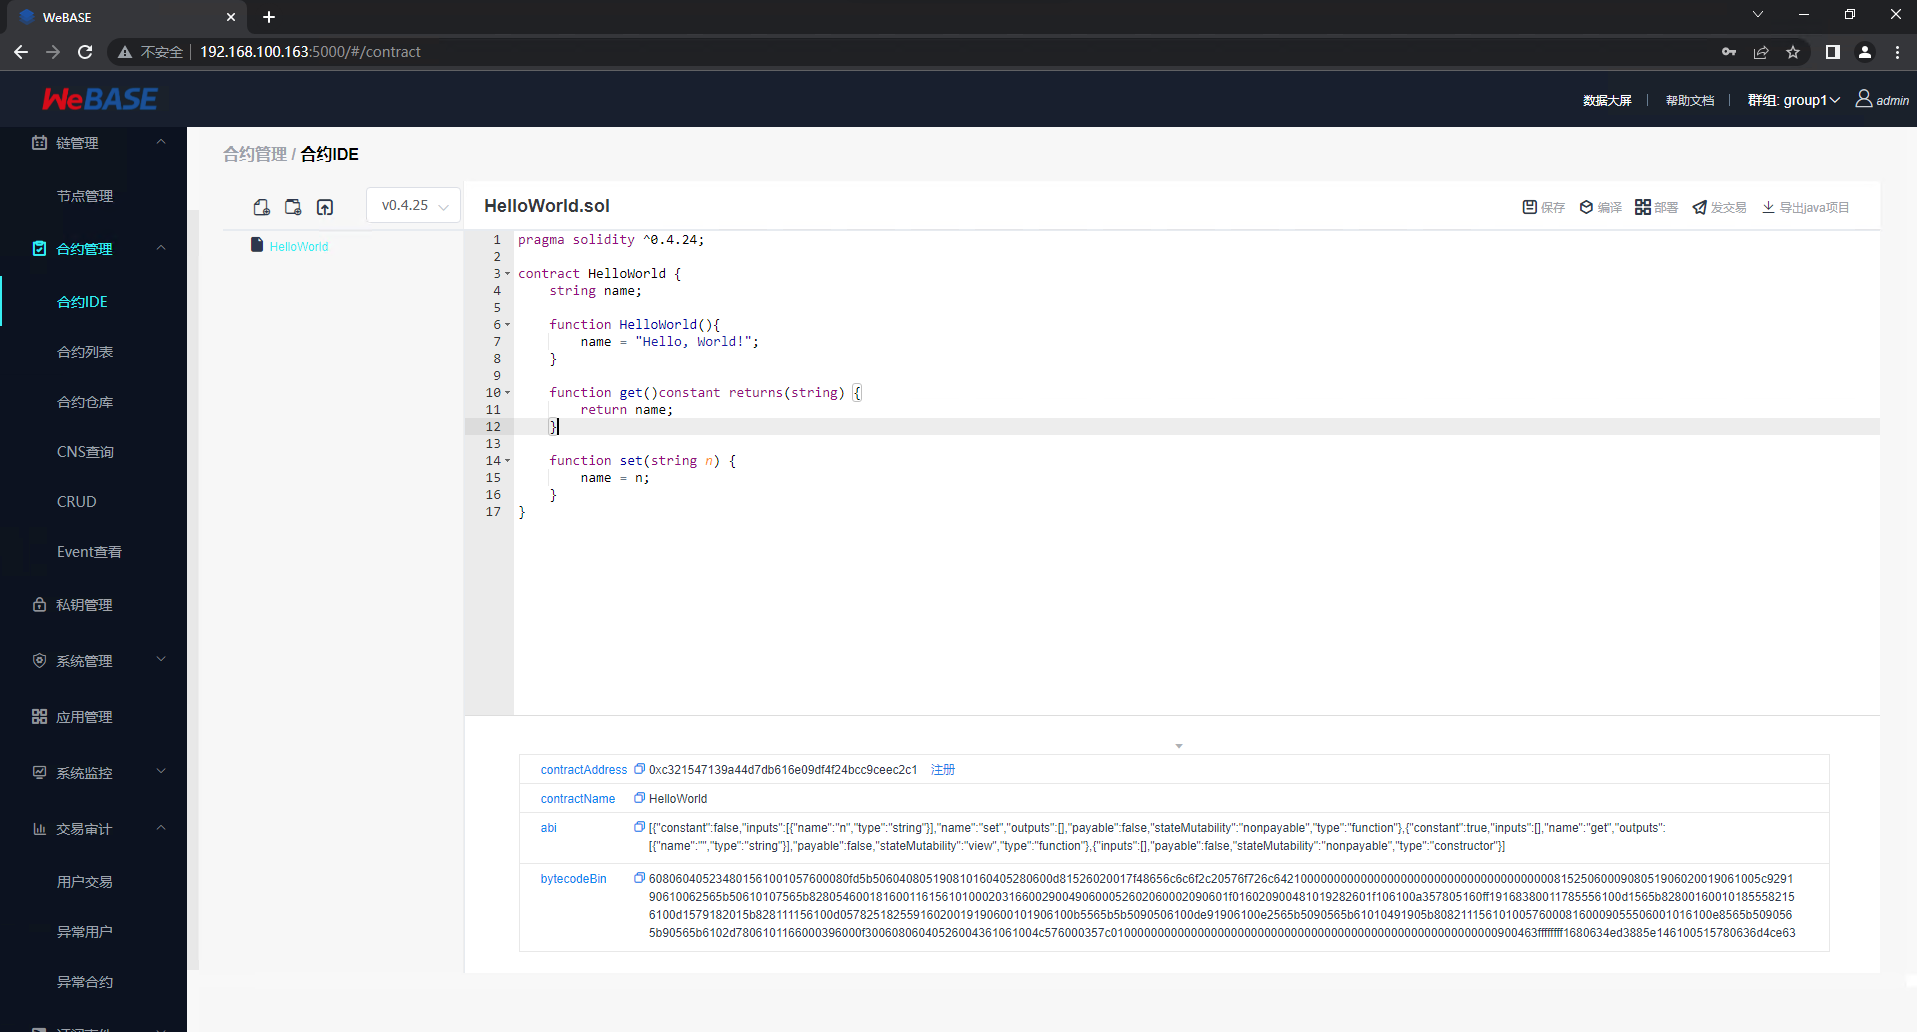
HelloWorld合约提供两个接口,分别是get()和set(),用于获取/设置合约变量name。合约内容如下:
pragma solidity ^0.4.24;

contract HelloWorld {
    string name;

    function HelloWorld(){
        name = "Hello, World!";
    }

    function get()constant returns(string) {
        return name;
    }

    function set(string n) {
        name = n;
    }
}
# 部署HelloWorld合约
为了方便用户快速体验,HelloWorld合约已经写好在页面中。

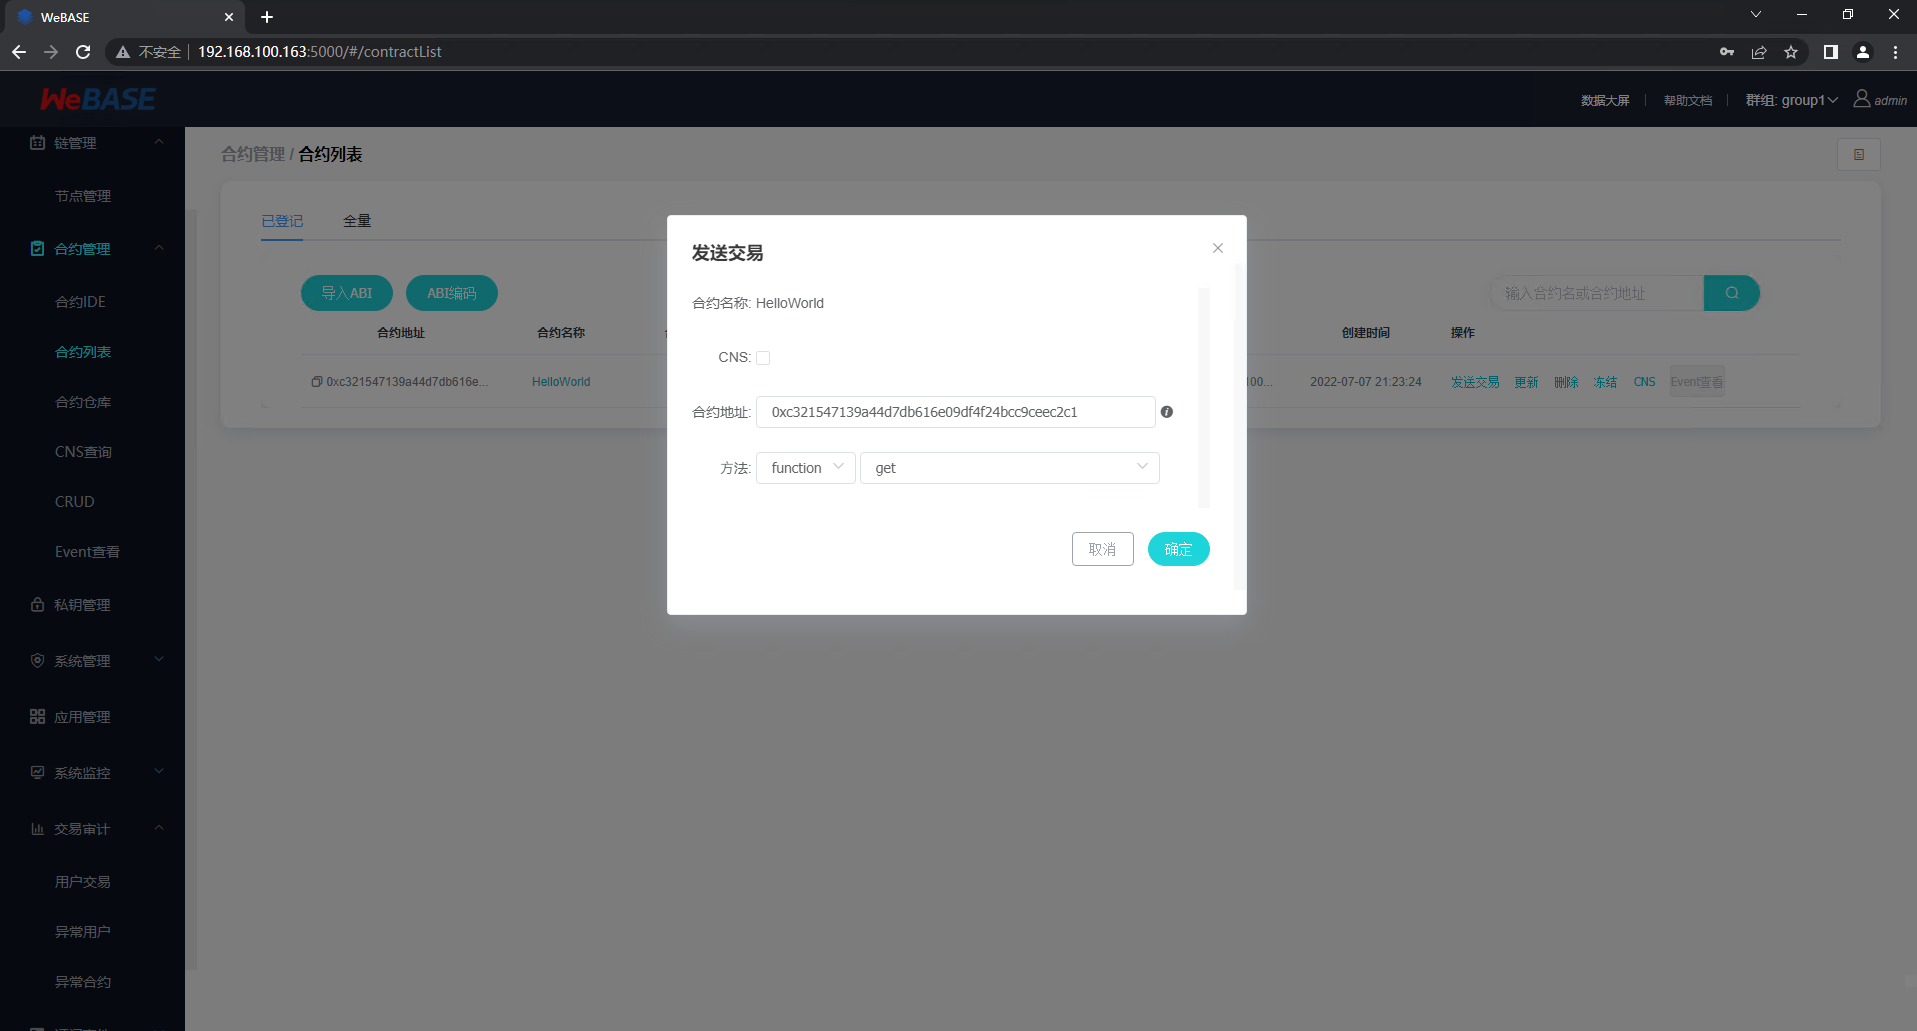
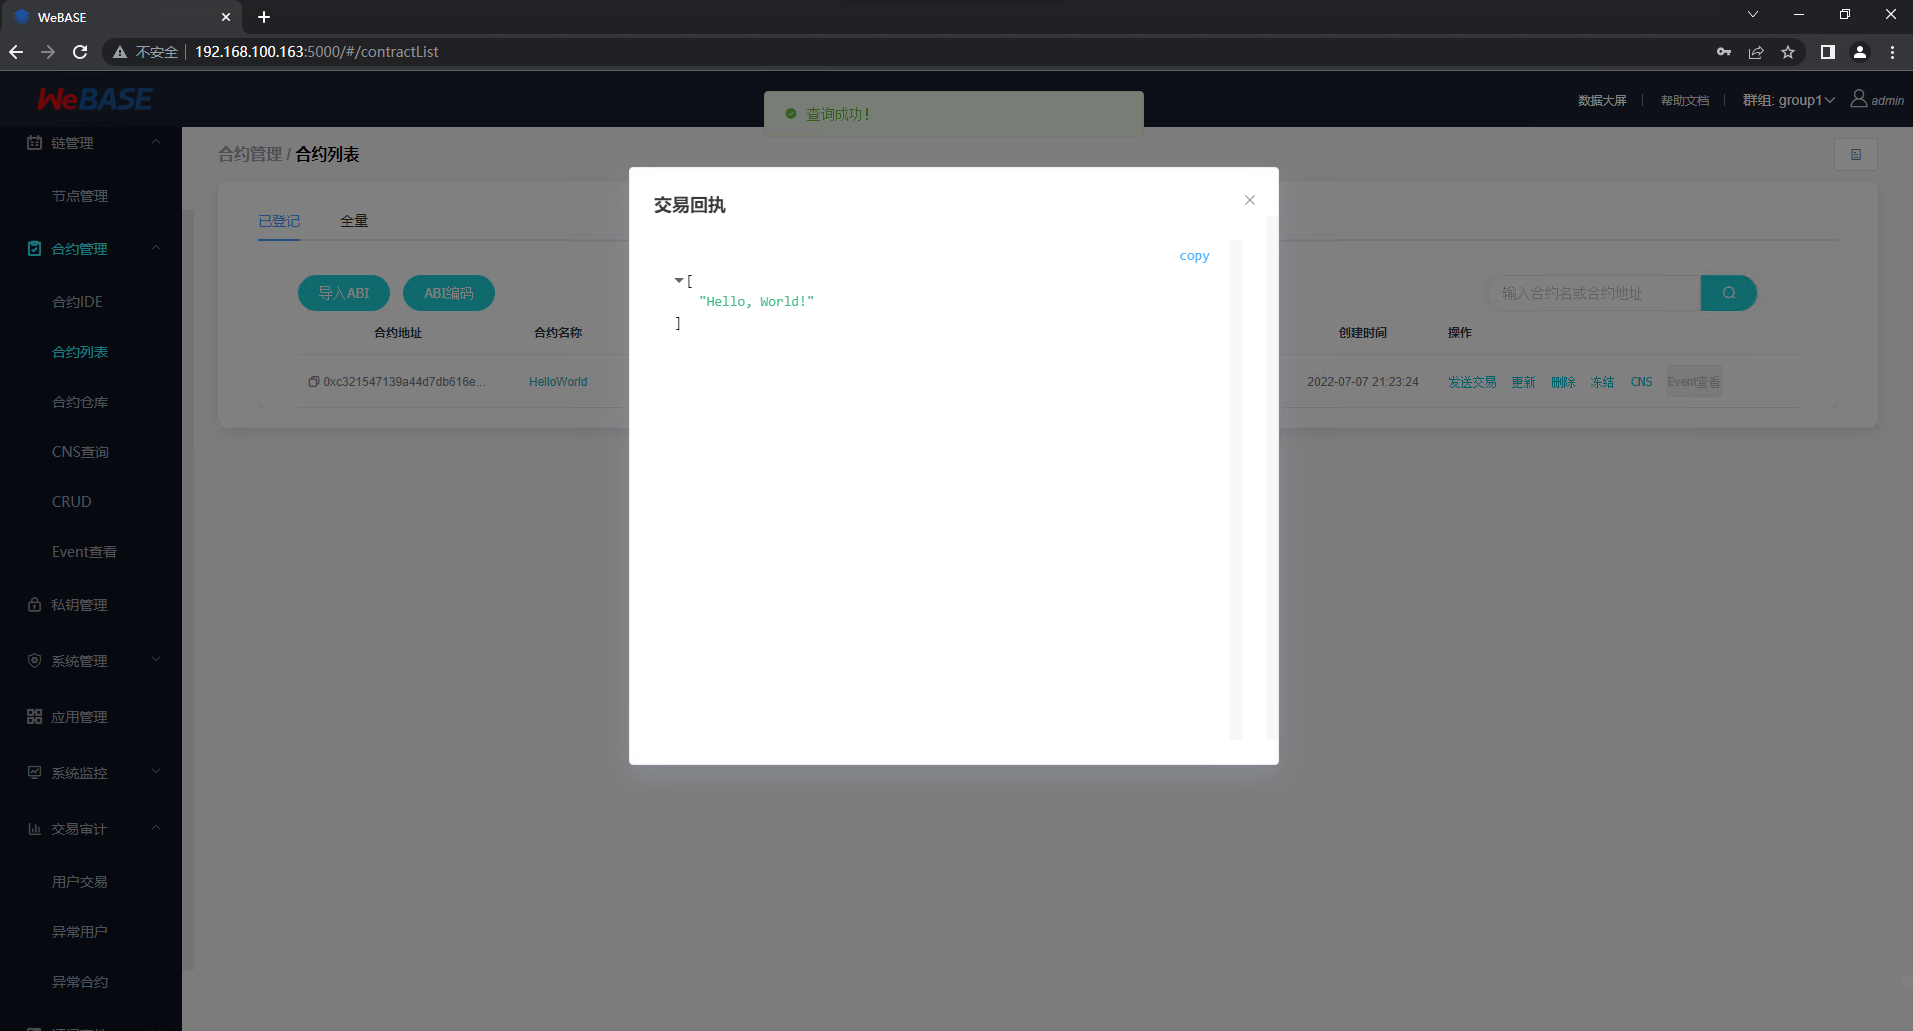
# 调用HelloWorld合约


