 Rancher多混合云平台管理
# Rancher多混合云平台管理
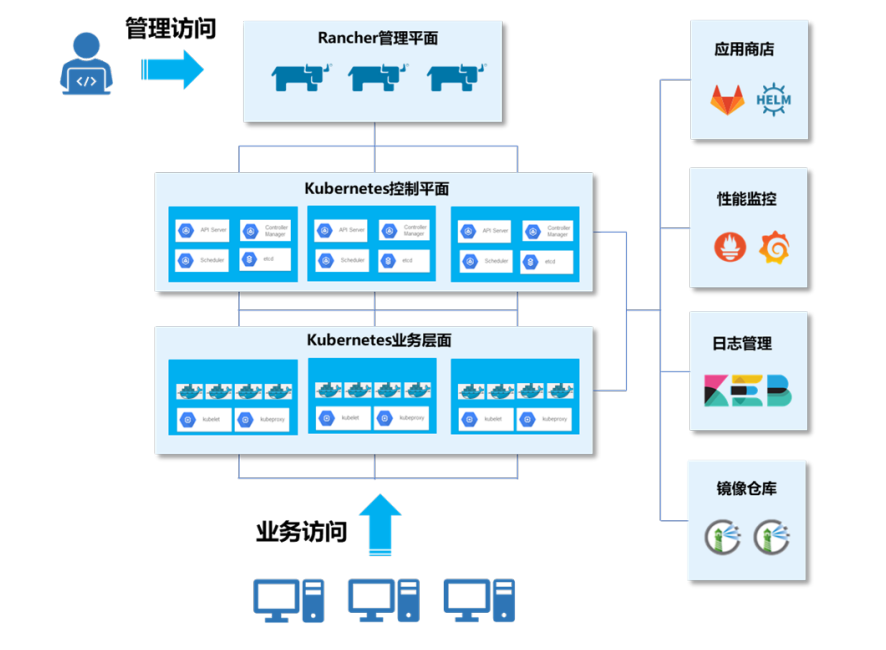
# 如下是Rancher的架构图
| IP地址 | 主机名 | 节点 |
|---|---|---|
| 10.18.5.10 | master01 | Rancher master、K8S master、K8S worker |
| 10.18.5.11 | master02 | Rancher master、K8S master、K8S worker |
| 10.18.5.12 | master03 | Rancher master、K8S master、K8S worker |
| 10.18.5.13 | nginx | Nginx |
| 10.18.5.14 | cicd | GitLab、Harbor、Jenkins |
# 部署Harbor仓库
使用操作系统均为CentOS7.5-1804的
使用rancher_offline_installation_package.tar软件包
# 基础环境配置
#
在所有节点执行
# (1)配置Yum源
所有节点上传离线包rancher_offline_installation_package.tar,gz 至/root目录,解压安装包
# tar -zxvf rancher_offline_installation_package.tar
# cd offline_installation_package/yum/
# tar -zxvf rancher_yum.tar -C /opt/
# mv /etc/yum.repos.d/* /media/
# vi /etc/yum.repos.d/rancher.repo
[rancher]
name=rancher
baseurl=file:///opt/rancher/
gpgcheck=0
enabled=1

[centos]
name=centos
baseurl=http://10.18.5.15/file/centos
gpgcheck=0
enabled=1
# (2)配置主机映射
修改主机名后配置主机映射
# vi /etc/hosts

127.0.0.1 localhost localhost.localdomain localhost4 localhost4.localdomain4
::1 localhost localhost.localdomain localhost6 localhost6.localdomain6
10.18.5.10 master01
10.18.5.11 master02
10.18.5.12 master03
10.18.5.13 nginx
10.18.5.14 cicd
# (3)配置防火墙及SELinux
清除所有的iptables规则以及关闭selinux
# systemctl stop firewalld && systemctl disable firewalld
# iptables -F 						# 清除所有制订的规则
# iptables -X						# 清除所有用户“自定义”的 chain
# iptables -Z 						# 将所有 chain 的计数与流量统计都归零
# iptables-save
# sed -i 's/SELINUX=enforcing/SELINUX=disabled/g' /etc/selinux/config
# (4)关闭Swap分区
永久禁用虚拟内存
# swapoff -a
# sed -i 's/.*swap.*/#&/' /etc/fstab
# (5)配置路由转发
# cat << EOF | tee /etc/sysctl.d/k8s.conf
net.ipv4.ip_forward = 1
net.bridge.bridge-nf-call-ip6tables = 1
net.bridge.bridge-nf-call-iptables = 1
EOF

# modprobe br_netfilter
# sysctl -p /etc/sysctl.d/k8s.conf
# (6)安装 Docker
# yum -y install yum-utils device-mapper-persistent-data lvm2
# cd /opt/rancher/base/
# yum install -y containerd.io-1.2.13-3.1.el7.x86_64.rpm docker-ce-19.03.8-3.el7.x86_64.rpm docker-ce-cli-19.03.8-3.el7.x86_64.rpm
# systemctl start docker && systemctl enable docker
# (7)daemon.json文件配置如下
# cat > /etc/docker/daemon.json <<EOF
{
 "insecure-registries" : ["0.0.0.0/0"],
 "registry-mirrors": ["https://7bezldxe.mirror.aliyuncs.com/"],
 "exec-opts": ["native.cgroupdriver=cgroupfs"],
 "log-driver": "json-file",
 "log-opts": {
 "max-size": "100m",
 "max-file": "3"
 },
 "storage-driver": "overlay2",
 "storage-opts": [
 "overlay2.override_kernel_check=true"
 ]
}
EOF

# systemctl daemon-reload && systemctl  restart docker
# 部署Harbor
# 在cicd节点安装Harbor
# (1)安装docker-compose
[root@cicd ~]# chmod +x offline_installation_package/docker-compose/v1.25.5-docker-compose-Linux-x86_64
[root@cicd ~]# cp offline_installation_package/docker-compose/v1.25.5-docker-compose-Linux-x86_64 /usr/local/bin/docker-compose
[root@cicd ~]# docker-compose version
docker-compose version 1.25.5, build 8a1c60f6
docker-py version: 4.1.0
CPython version: 3.7.5
OpenSSL version: OpenSSL 1.1.0l 10 Sep 2019
# (2)部署Harbor
- 修改Harbor配置信息(关于https的注释)
- 解决Harbor报错问题(shadow文件的值)
- 配置
rancher用户密码Rancher@123以及创建两个仓库rancher和cnrancher - 导入需要上传的镜像(执行脚本push镜像)
[root@cicd ~]# cd offline_installation_package/harbor/
[root@cicd harbor]# docker load -i harbor.tar
[root@cicd harbor]# tar -zxvf harbor-online-installer-v1.10.2.tgz
[root@cicd harbor]# cd harbor
- 此处需要修改配置文件
[root@cicd harbor]# vi harbor.yml
hostname: 10.18.5.14 		# 将域名修改为本机 IP
harbor_admin_password: Harbor12345
#https: 					# 禁用 https
 # https port for harbor, default is 443
 # port: 443
 # The path of cert and key files for nginx
 # certificate: /your/certificate/path
 # private_key: /your/private/key/path
- 启动Harbor(这里将会出现报错)
[root@cicd harbor]# ./install.sh --with-clair
- 导出harbor-log容器
[root@cicd harbor]# mkdir -p /tmp/harbor-log
[root@cicd harbor]# cd /tmp/harbor-log
[root@cicd harbor-log]# docker export harbor-log -o harbor-log.tar
- 解压tar包,修改 shadow 文件的值
[root@cicd harbor-log]# tar xvfp harbor-log.tar
[root@cicd harbor-log]# sed -i 's/:90:/:99999:/g' /tmp/harbor-log/etc/shadow
- 将修改后的shadow文件挂载到harbor-log容器内
[root@cicd harbor-log]# mkdir -p /opt/harbor-log-etc/
[root@cicd harbor-log]# cp /tmp/harbor-log/etc/shadow /opt/harbor-log-etc/shadow
- 修改docker-composr.yml文件,配置harbor-log容器的volumes
[root@cicd harbor-log]# cd /root/offline_installation_package/harbor/harbor/
[root@cicd harbor]# vi docker-compose.yml
 volumes:
   - /data/registry:/storage:z
   - ./common/config/registry/:/etc/registry/:z
   - type: bind
     source: /data/secret/registry/root.crt
     target: /etc/registry/root.crt
   - type: bind 						#添加这一段,挂载刚刚修改的shadow
     source: /opt/harbor-log-etc/shadow
     target: /etc/shadow
- 重启Harbor
[root@cicd harbor]# docker-compose down
[root@cicd harbor]# docker-compose up -d
Creating network "harbor_harbor" with the default driver
Creating network "harbor_harbor-clair" with the default driver
Creating harbor-log ... done
Creating redis         ... done
Creating harbor-db     ... done
Creating harbor-portal ... done
Creating registryctl   ... done
Creating registry      ... done
Creating harbor-core   ... done
Creating clair         ... done
Creating nginx             ... done
Creating harbor-jobservice ... done
Creating clair-adapter     ... done
# (3)上传镜像至Harbor仓库
- 启动Harbor成功后,Web端登录Harbor(http://10.18.5.14),用户名为admin,密码为Harbor12345。
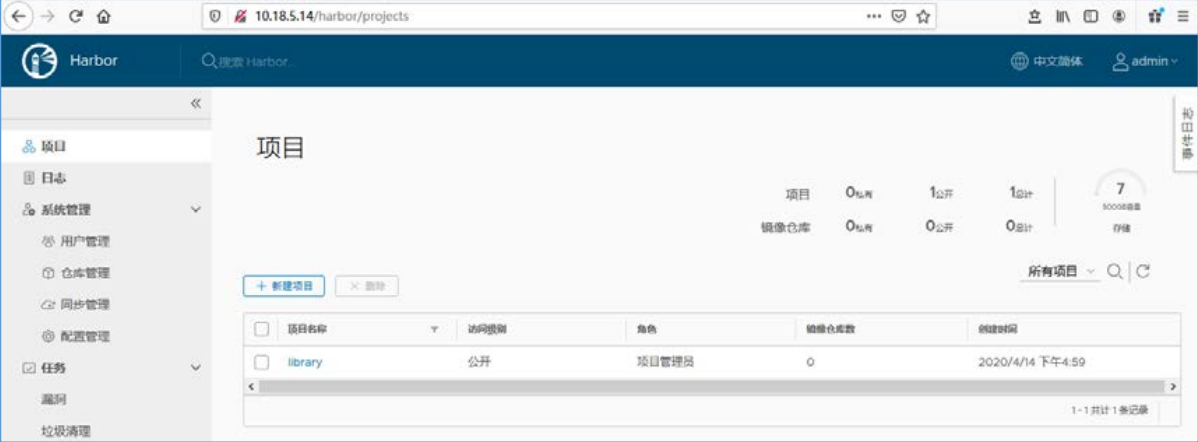
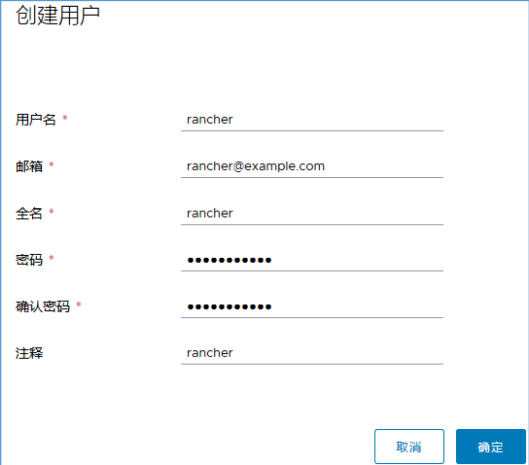
- 在左侧导航栏选择“系统管理→用户管理→创建用户”菜单命令,创建rancher用户,密码为Rancher@123。
- Harbor切换为rancher用户登录,登录后创建项目(镜像仓库)rancher和cnrancher,访问级别为公开

# (4)导入镜像
- 使用rancher用户登录Harbor仓库
[root@cicd ~]# docker login 10.18.5.14
Username: rancher
Password:
WARNING! Your password will be stored unencrypted in /root/.docker/config.json.
Configure a credential helper to remove this warning. See
https://docs.docker.com/engine/reference/commandline/login/#credentials-store

Login Succeeded
- 导入镜像
[root@cicd ~]# cd /root/offline_installation_package/rancher-offline-images/
[root@cicd rancher-offline-images]# docker load -i rancher.tar
[root@cicd rancher-offline-images]# chmod +x *.sh
[root@cicd rancher-offline-images]# ./rancher-push-images.sh

输入镜像仓库地址(不加 http/https): 10.18.5.14
输入镜像仓库用户名: rancher
输入镜像仓库用户密码: Rancher@123
设置的仓库地址为: 10.18.5.14,用户名: rancher,密码: xxx
是否确认(Y/N): y
WARNING! Using --password via the CLI is insecure. Use --password-stdin.
WARNING! Your password will be stored unencrypted in
/root/.docker/config.json.
Configure a credential helper to remove this warning. See
https://docs.docker.com/engine/reference/commandline/login/#credentials-store
镜像仓库 Login Succeeded
The push refers to repository [10.18.5.14/rancher/calico-cni]
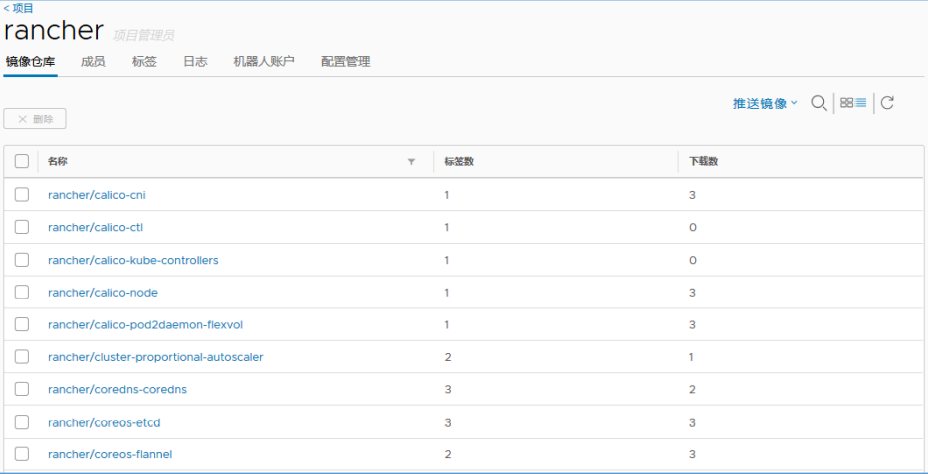
- 推送完成后,登录 Harbor并进入rancher项目
# 部署K8S HA集群
部署Nginx反向代理
部署Kubernetes HA集群
# Nginx节点部署反向代理
#
使用Nginx节点部署
# (1)编写配置文件
在nginx节点编写nginx.conf文件
[root@nginx ~]# mkdir /etc/nginx
[root@nginx ~]# vi /etc/nginx/nginx.conf
worker_processes 4;
worker_rlimit_nofile 40000;
events {
 worker_connections 8192;
}
stream {
 upstream rancher_servers_https {
 	least_conn;
 	server 10.18.5.10:30001 max_fails=3 fail_timeout=5s;
 	server 10.18.5.11:30001 max_fails=3 fail_timeout=5s;
 	server 10.18.5.12:30001 max_fails=3 fail_timeout=5s;
 }
 server {
 	listen 443;
 	proxy_pass rancher_servers_https;
 }
}
# (2)启动Nginx
使用编辑好的配置文件/etc/nginx.conf,以容器的形式运行Nginx服务,而不需要将其安装在宿主机上。
[root@nginx ~]# docker login 10.18.5.14 -u rancher -p Rancher@123
[root@nginx ~]# docker run --name lb-nginx -d --restart=unless-stopped \
-p 80:80 -p 443:443 \
-v /etc/nginx/nginx.conf:/etc/nginx/nginx.conf \
10.18.5.14/rancher/nginx:1.14

20ee0cf1e14c21552c912ce9fe8783e4a4fe1c129142680bfc4601d1718455f8
# 部署Kubernetes HA集群
#
在所有Master节点创建用户配置免密,master01作为主要工具节点
# (1)创建用户
因为CentOS的安全限制,无法使用root账户通过RKE安装K8S集群。所以无论是通过RKE还是Custom安装K8S,建议CentOS用户使用非root用户来运行Docker。
所有master节点需要创建rancher用户,设置从属组为docker
# useradd -G docker rancher
# echo -n rancher | passwd --stdin rancher
Changing password for user rancher.
passwd: all authentication tokens updated successfully.
# (2)配置免密
所有master节点配置rancher用户SSH无密钥访问(密码为 rancher)
# ssh-keygen
# for i in master01 master02 master03;do ssh-copy-id -i ~/.ssh/id_rsa.pub rancher@$i;done
# (3)安装RKE工具
[root@master01 ~]# cp offline_installation_package/rke/v1.1.0-rke_linux-amd64 /usr/local/bin/rke
[root@master01 ~]# chmod +x /usr/local/bin/rke
[root@master01 ~]# rke -v
rke version v1.1.0
# (4)编写YAML文件
在任意master节点编写rancher-cluster.yml文件,以master01为例
[root@master01 ~]# vi rancher-cluster.yaml
nodes:
  - address: 10.18.5.10
    user: rancher
    role: [controlplane,worker,etcd]
  - address: 10.18.5.11
    user: rancher
    role: [controlplane,worker,etcd]
  - address: 10.18.5.12
    user: rancher
    role: [controlplane,worker,etcd]

# 配置 Harbor 私有仓库
private_registries:
  - url: 10.18.5.14
    user: rancher
    password: Rancher@123
    is_default: true

services:
  etcd:
    extra_args:
      auto-compaction-retention: 240
      quota-backend-bytes: '6442450944'
								# 修改空间配额为$((6*1024*1024*1024)),默认 2G,最大 8G
    backup_config:
      enabled: true 			# 设置 true 启用 etcd 自动备份,设置 false 禁用;
      interval_hours: 6 		# 快照创建间隔时间,不加此参数,默认 5 分钟;
      retention: 6 				# etcd 备份保留份数;
  ingress:
    provider: none
# (5)格式转换
安装dos2unix工具并转换格式
[root@master01 ~]# yum -y install dos2unix
[root@master01 ~]# dos2unix rancher-cluster.yaml
dos2unix: converting file rancher-cluster.yaml to Unix format ...
# (6)部署K8S集群
- 所有master节点登录Harbor仓库:
# docker login 10.18.5.14
Username: rancher
Password:

WARNING! Your password will be stored unencrypted in
/root/.docker/config.json.
Configure a credential helper to remove this warning. See
https://docs.docker.com/engine/reference/commandline/login/#credentials-store

Login Succeeded
- 在master01节点使用RKE启动集群
[root@master01 ~]# rke up --config rancher-cluster.yaml
INFO[0000] Running RKE version: v1.1.0
INFO[0000] Initiating Kubernetes cluster
INFO[0000] [dialer] Setup tunnel for host [10.18.5.12]
INFO[0000] [dialer] Setup tunnel for host [10.18.5.10]
INFO[0000] [dialer] Setup tunnel for host [10.18.5.11]
........
INFO[0234] Finished building Kubernetes cluster successfully
安装 kubectl工具
K8S集群部署成功后会生成一个文件
kube_config_rancher-rancher-cluster.yaml,这个文件包含kubectl和Helm访问K8S集群的凭据。
创建 kube 目录:
[root@master01 ~]# mkdir ~/.kube

将文件拷贝到.kube/下并重命名为 config:
[root@master01 ~]# cp kube_config_rancher-cluster.yaml ~/.kube/config

安装 kubectl 工具:
[root@master01 ~]# cd /root/offline_installation_package/kubectl/
[root@master01 kubectl]# cp linux-amd64-v1.18.1-kubectl kubectl
[root@master01 kubectl]# chmod +x ./kubectl
[root@master01 kubectl]# cp kubectl /usr/local/bin/
[root@master01 kubectl]# kubectl version --client
Client Version: version.Info{Major:"1", Minor:"18", GitVersion:"v1.18.0", GitCommit:"9e991415386e4cf155a24b1da15becaa390438d8", GitTreeState:"clean", BuildDate:"2020-03-25T14:58:59Z", GoVersion:"go1.13.8", Compiler:"gc", Platform:"linux/amd64"}
- 查看集群状态
[root@master01 ~]# kubectl get cs
NAME 				STATUS 		MESSAGE 	ERROR
controller-manager 	Healthy 		ok
scheduler 			Healthy 		ok
etcd-0 Healthy {"health":"true"}
etcd-1 Healthy {"health":"true"}
etcd-2 Healthy {"health":"true"}
# (7)自动补全
安装bash-completion开启Tab键自动补全功能
[root@master01 ~]# yum install -y bash-completion
[root@master01 ~]# source  /usr/share/bash-completion/bash_completion
[root@master01 ~]# source <(kubectl completion bash)

将kubectl自动补全添加到配置文件中,可以在以后的shell中自动加载:
[root@master01 ~]# echo "source <(kubectl completion bash)" >> ~/.bashrc
# 部署Rancher HA集群
需要安装helm然后作为Kubernetes体系的包管理工具
helm作为应用打包交付方式
# (1)安装Helm工具
在master01节点安装Helm
[root@master01 ~]# cd /root/offline_installation_package/helm/
[root@master01 helm]# tar -xf helm-v3.0.3-linux-amd64.tar.gz
[root@master01 helm]# cp linux-amd64/helm /usr/local/bin/
[root@master01 ~]# helm version
version.BuildInfo{Version:"v3.0.3", GitCommit:"ac925eb7279f4a6955df663a0128044a8a6b7593", GitTreeState:"clean", GoVersion:"go1.13.6"}
Helm的常用命令如下
# helm version 						查看版本
# helm repo (add|index|list|remove|update) Helm 仓库的管理
# helm search 查询 Chart 包,查询命令分为 helm search hub 和 helm search repo
# helm pull 						将 Chart 包下载到本地,缺省下载最新的 Chart 版本,并且是 tgz包
# helm install 						安装应用
# helm list 						列出 default 命名空间的 Release 列表
# helm uninstall 					卸载应用
# (2)生成证书
要保证Web浏览器到服务器的安全连接,HTTPS几乎是唯一选择。在 master01 节点使用提供的脚本生成自签名证书
- 参数含义如下:
--ssl-domain: 生成 SSL证书需要的主域名,如不指定则默认为localhost,如果是IP访问服务,则可忽略;--ssl-date: SSL有效期,默认10年;--ca-date: CA有效期,默认10年。
[root@master01 ~]# cd /root/offline_installation_package/cert/
[root@master01 cert]# chmod +x create_self-signed-cert.sh
[root@master01 cert]# ./create_self-signed-cert.sh \
--ssl-trusted-ip=10.18.5.10,10.18.5.11,10.18.5.12,10.18.5.13 \
--ssl-size=2048 \
--ssl-date=3650
# (3)部署Rancher
- 在master01节点创建Rancher Server的命名空间
[root@master01 cert]# kubectl create namespace cattle-system
namespace/cattle-system created
- 使用自签名证书部署Rancher,需要创建证书secret和CA证书secret。在Rancher Server的命名空间创建服务证书和私钥密文
[root@master01 cert]# kubectl -n cattle-system create secret tls tls-rancher-ingress --cert=./tls.crt --key=./tls.key
secret/tls-rancher-ingress created
- 在Rancher Server的命名空间创建CA证书密文
[root@master01 cert]# kubectl -n cattle-system create secret generic tls-ca --from-file=cacerts.pem
secret/tls-ca created
# Helm安装Rancher的语法
很多场景需要使用IP去直接访问Rancher Server。
因为ingress默认不支持IP访问,所以这里禁用ingress,需要通过NodePort把Rancher Server容器443端口映射到宿主机上。这个时候Rancher Server容器将作为SSL终止并配置SSL证书,将请求流量转发到Rancher Server容器的443端口,然后通过任意master节点IP+NodePort端口即可访问Rancher。此安装方式语法如下:
[root@master01 rancher-charts]# helm install rancher rancher/ --namespace cattle-system \
--set rancherImage= \ # 指定镜像名称,不要指定镜像版本
--set busyboxImage= \
--set service.type=NodePort \
--set service.ports.nodePort= \ # 指定映射端口
--set privateCA=true \
--set useBundledSystemChart=true \
--set privateRegistry=true \ # 设置使用私有仓库
--set systemDefaultRegistry= # 设置私有仓库地址,注意不要添加 协议头
- 使用helm部署rancher
[root@master01 cert]# cd /root/offline_installation_package/rancher-charts/server-chart/

[root@master01 server-chart]# helm install rancher rancher/ --namespace cattle-system \
--set service.type=NodePort --set service.ports.nodePort=30001 \
--set tls=internal --set ingress.tls.source=secret \
--set privateCA=true \
--set rancherImage=10.18.5.14/rancher/rancher \
--set busyboxImage=10.18.5.14/rancher/busybox


NAME: rancher
LAST DEPLOYED: Mon May 11 21:18:55 2020
NAMESPACE: cattle-system
STATUS: deployed
REVISION: 1
TEST SUITE: None
NOTES:
Rancher Server has been installed.
NOTE: Rancher may take several minutes to fully initialize. Please standby
while Certificates are being issued and Ingress comes up.
Check out our docs at https://rancher.com/docs/rancher/v2.x/en/

Browse to https://
Happy Containering!
- 如果Rancher Server部署过程中有问题,可以删除再重新执行helm install,删除命令如下
# helm uninstall -n cattle-system rancher
- 查看Pod状态
[root@master01 server-chart]# kubectl get pod -n cattle-system
NAME 					READY STATUS  RESTARTS 	AGE
rancher-7957bfd9f4-kj64g 2/2 Running  1 		2m24s
rancher-7957bfd9f4-mcj7q 2/2 Running  1 		2m24s
rancher-7957bfd9f4-pstc2 2/2 Running  1 		2m24s
# (4)访问Rancher
在Web端通过https://10.18.5.13访问Rancher
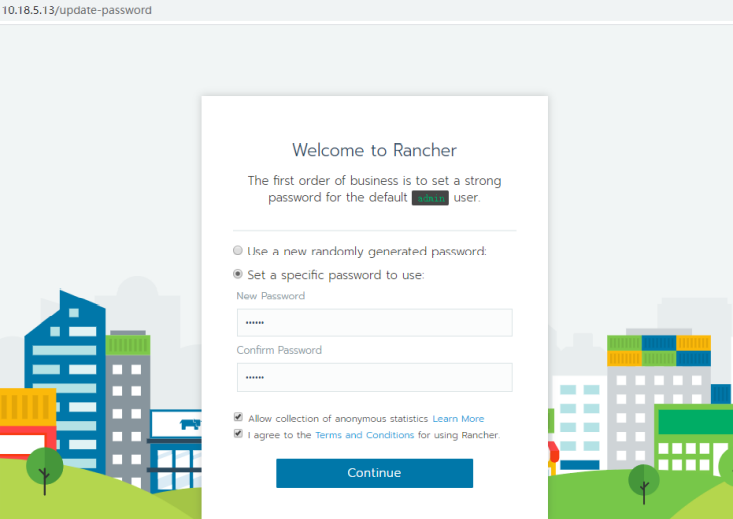
单击“Continue”按钮,设置 URL。此 URL 地址可以是 IP 也可以是域名,集群所有节点将使用该URL注册到Rancher,所以需要保证 所有节点能访问该地址。如果Rancher Server是多节点HA运行,请勿设置Rancher Server URL为某一个节点的IP地址,避免因某一个节点出现故障影响整个集群。如果Rancher Server URL使用域名,需把域名解析到所有Rancher Server节点IP或者VIP上。
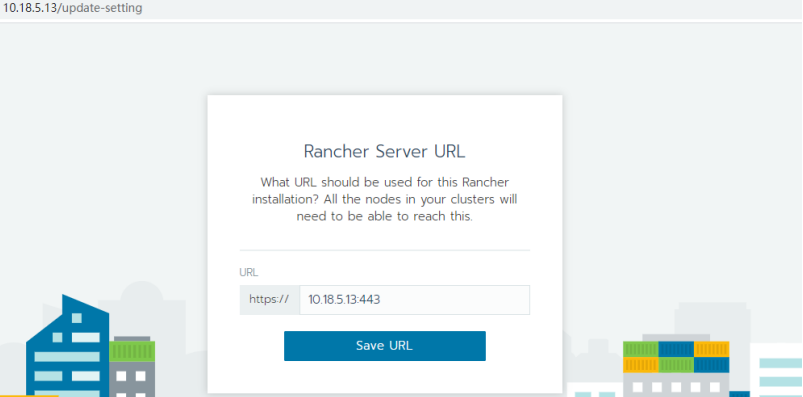
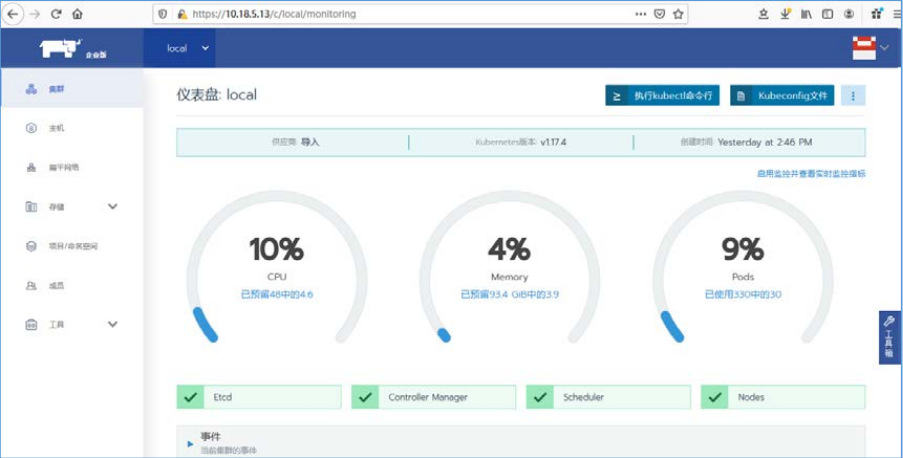
保存URL后进入Rancher全局页面,切换语言为中文简体。 在local集群中单击“┆”按钮,在下拉菜单中选择“升级”菜单命令,在跳转 页面直接单击“保存”按钮即可。

单击集群名称local进入集群仪表盘界面
# (5)安装Rancher CLI
Rancher CLI是一个统一的工具,可用于与Rancher进行交互。借助于此工具,可以操作Rancher并管理其下的资源。在master01节点解压安装包并移至/usr/bin目录下
[root@master01 ~]# cd /root/offline_installation_package/rancher-cli/
[root@master01 rancher-cli]# tar xf rancher-linux-amd64-v2.4.0.tar.gz -C /usr/local/
[root@master01 rancher-cli]# echo "export PATH=$PATH:/usr/local/rancher-v2.4.0" >> /etc/profile
[root@master01 rancher-cli]# source /etc/profile
[root@master01 rancher-cli]# rancher -v
rancher version v2.4.0
登录Rancher 全局页面,单击右上角的用户图标,在用户 下拉菜单中选择“API & Keys”命令进入 API &Key 管理界面。
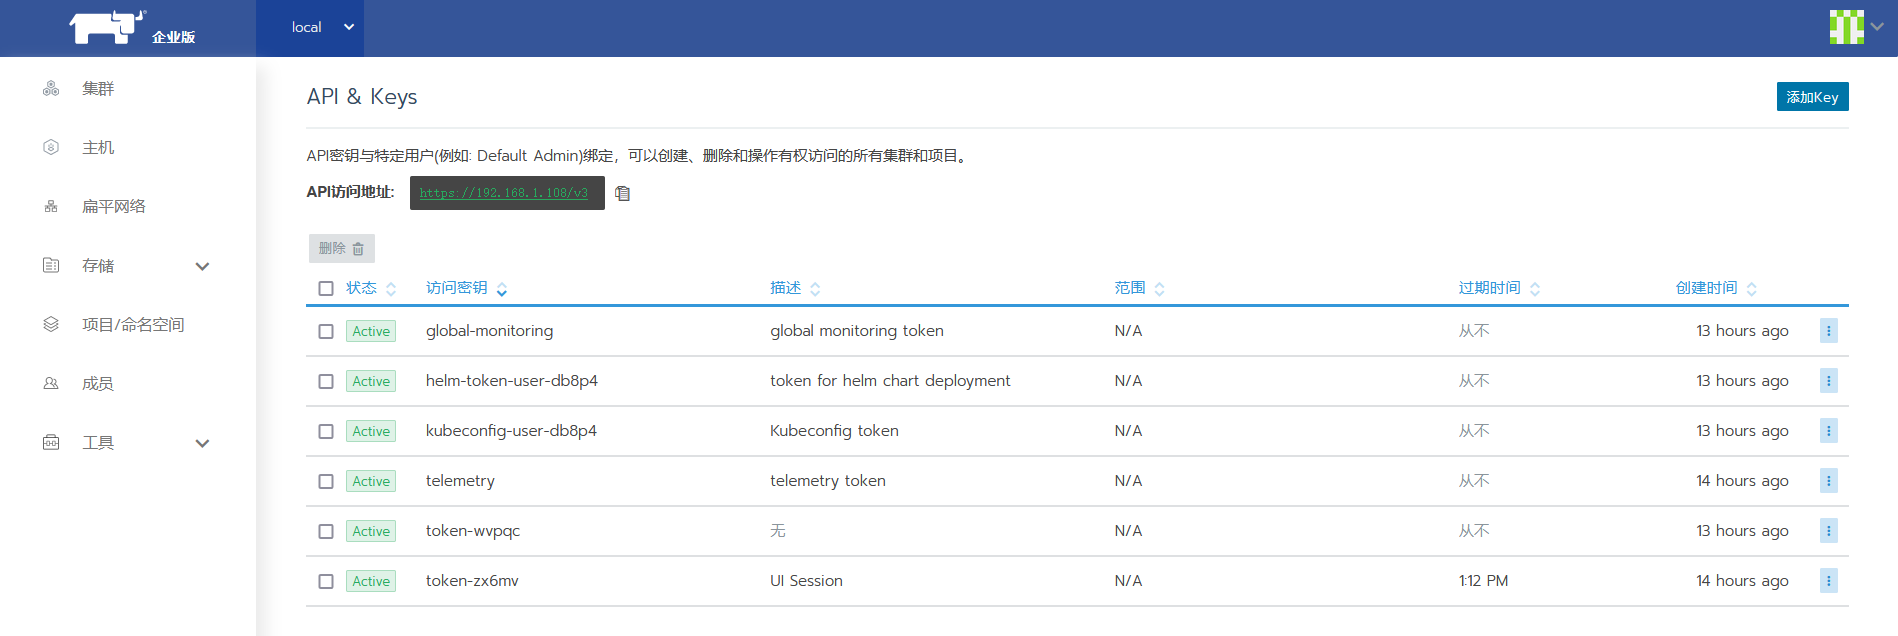
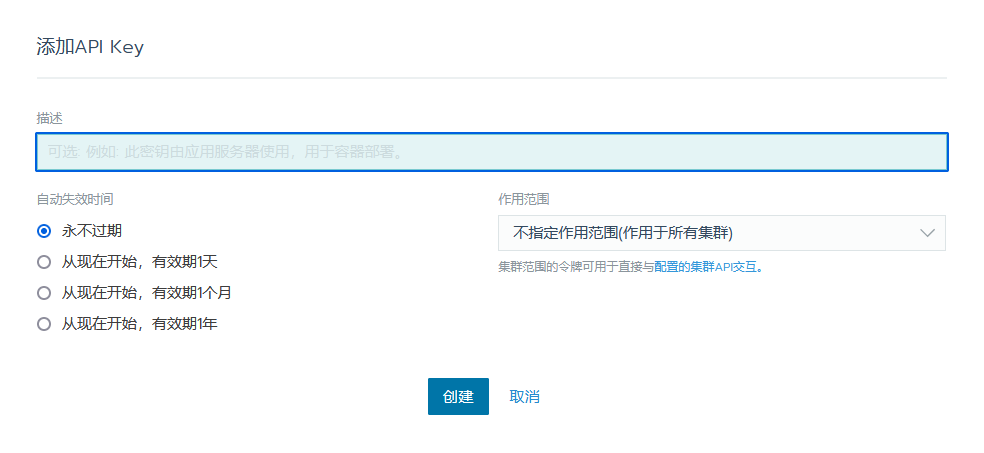
在右上角的“添加 Key”按钮跳转到“添加 API Key”页面,选择永不过期和作用于所有集群
单击“创建”按钮后可查看 Token 详细信息,API Key , 注意保存相关信息,后期配置 CLI 会用到。
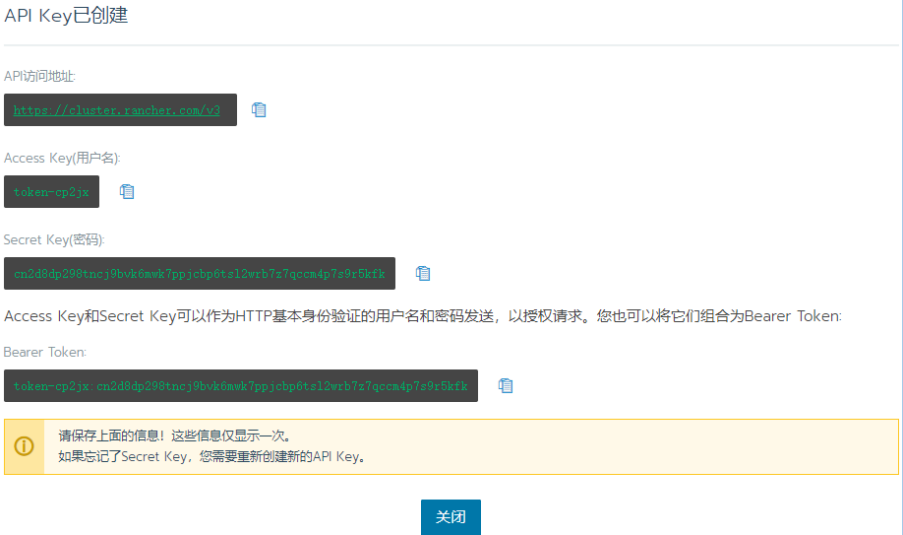
API KEY 由 4 个组件组成:
Endpoint:这是其他应用程序用于向 Rancher API 发送请求的地址。
Access Key:Token 的用户名。
Secret Key:Token 的密码。用于提示用户使用 API 身份验证的应用程序, 通常会将两个密钥一起输入。
Bearer Token:Token 的用户名和密码连接在一起。将此字符串用于提示 用户输入一个验证字符串的应用程序。
登录K8S集群,过程中需要输入yes确认
[root@master01 rancher-cli]# rancher login https://10.18.5.13/v3 --token token-cp2jx:cn2d8dp298tncj9bvk6mwk7ppjcbp6tsl2wrb7z7qccm4p7s9r5kfk
验证CLI工具是否对接成功
[root@master01 rancher-cli]# rancher kubectl get nodes
NAME STATUS ROLES AGE VERSION
10.18.5.10 Ready controlplane,etcd,worker 7h12m v1.17.4
10.18.5.11 Ready controlplane,etcd,worker 7h12m v1.17.4
10.18.5.12 Ready controlplane,etcd,worker 7h12m v1.17.4
# (6)启用监控
进入Rancher集群仪表盘界面
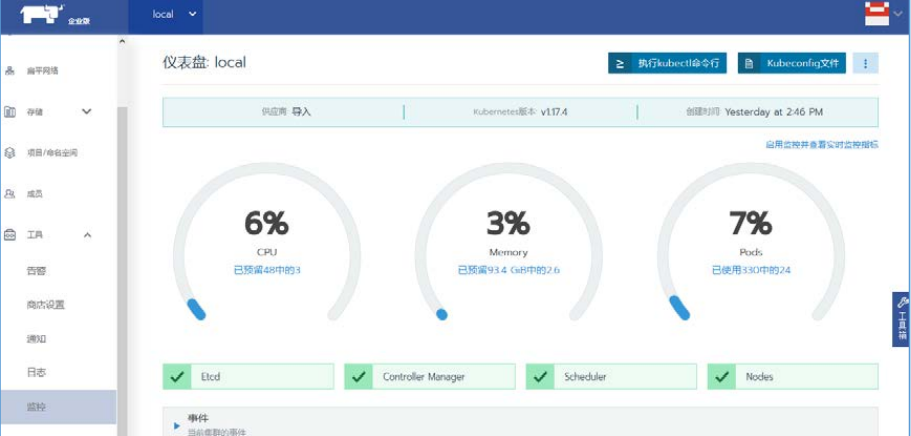
选择左侧导航栏选择“系统设置”菜单命令,在 system-default-registry中添加harbor节点IP地址

选择左侧导航栏“工具→监控”菜单命令,根据需要修改监控配置,如图
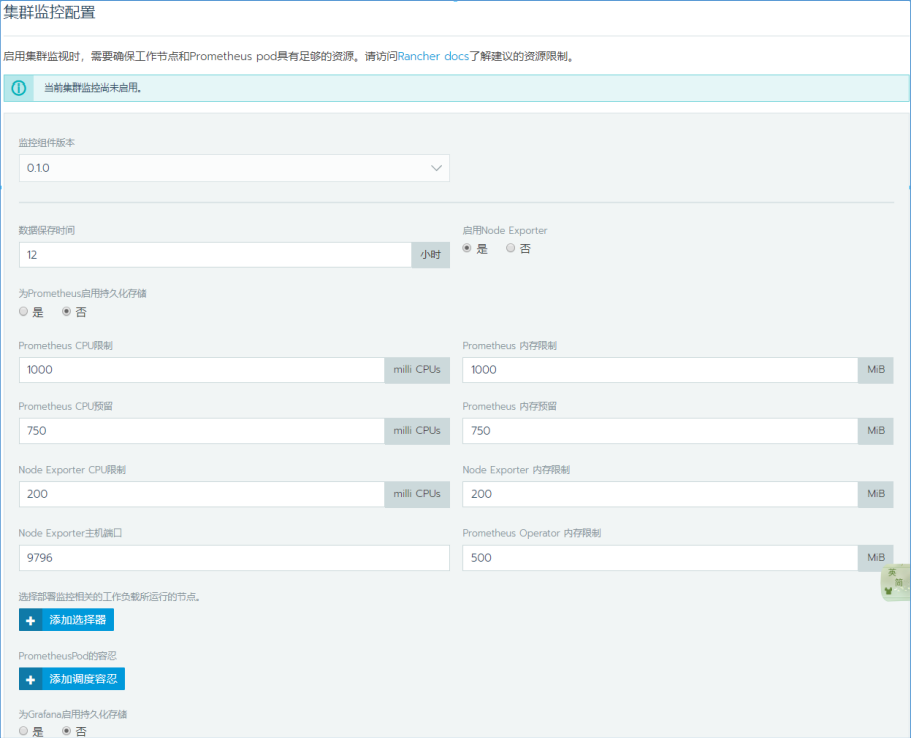
单击“启用监控”按钮,系统会自动生成命名空间 cattle-prometheus,查看 该命名空间下Pod状态
[root@master01 ~]# kubectl get pods -n cattle-prometheus
NAME                                                       READY   STATUS    RESTARTS   AGE
exporter-kube-state-cluster-monitoring-6cb8fd84bc-zk7rc    1/1     Running   0          12h
exporter-node-cluster-monitoring-dsdbv                     1/1     Running   0          12h
exporter-node-cluster-monitoring-vhbc4                     1/1     Running   0          12h
exporter-node-cluster-monitoring-xvbhn                     1/1     Running   0          12h
grafana-cluster-monitoring-c8988fbdb-9ctpd                 2/2     Running   0          12h
prometheus-cluster-monitoring-0                            6/6     Running   1          12h
prometheus-operator-monitoring-operator-7b88c6ff66-td5zf   1/1     Running   0          12h
待所有 Pod 启动成功后返回集群仪表盘界面
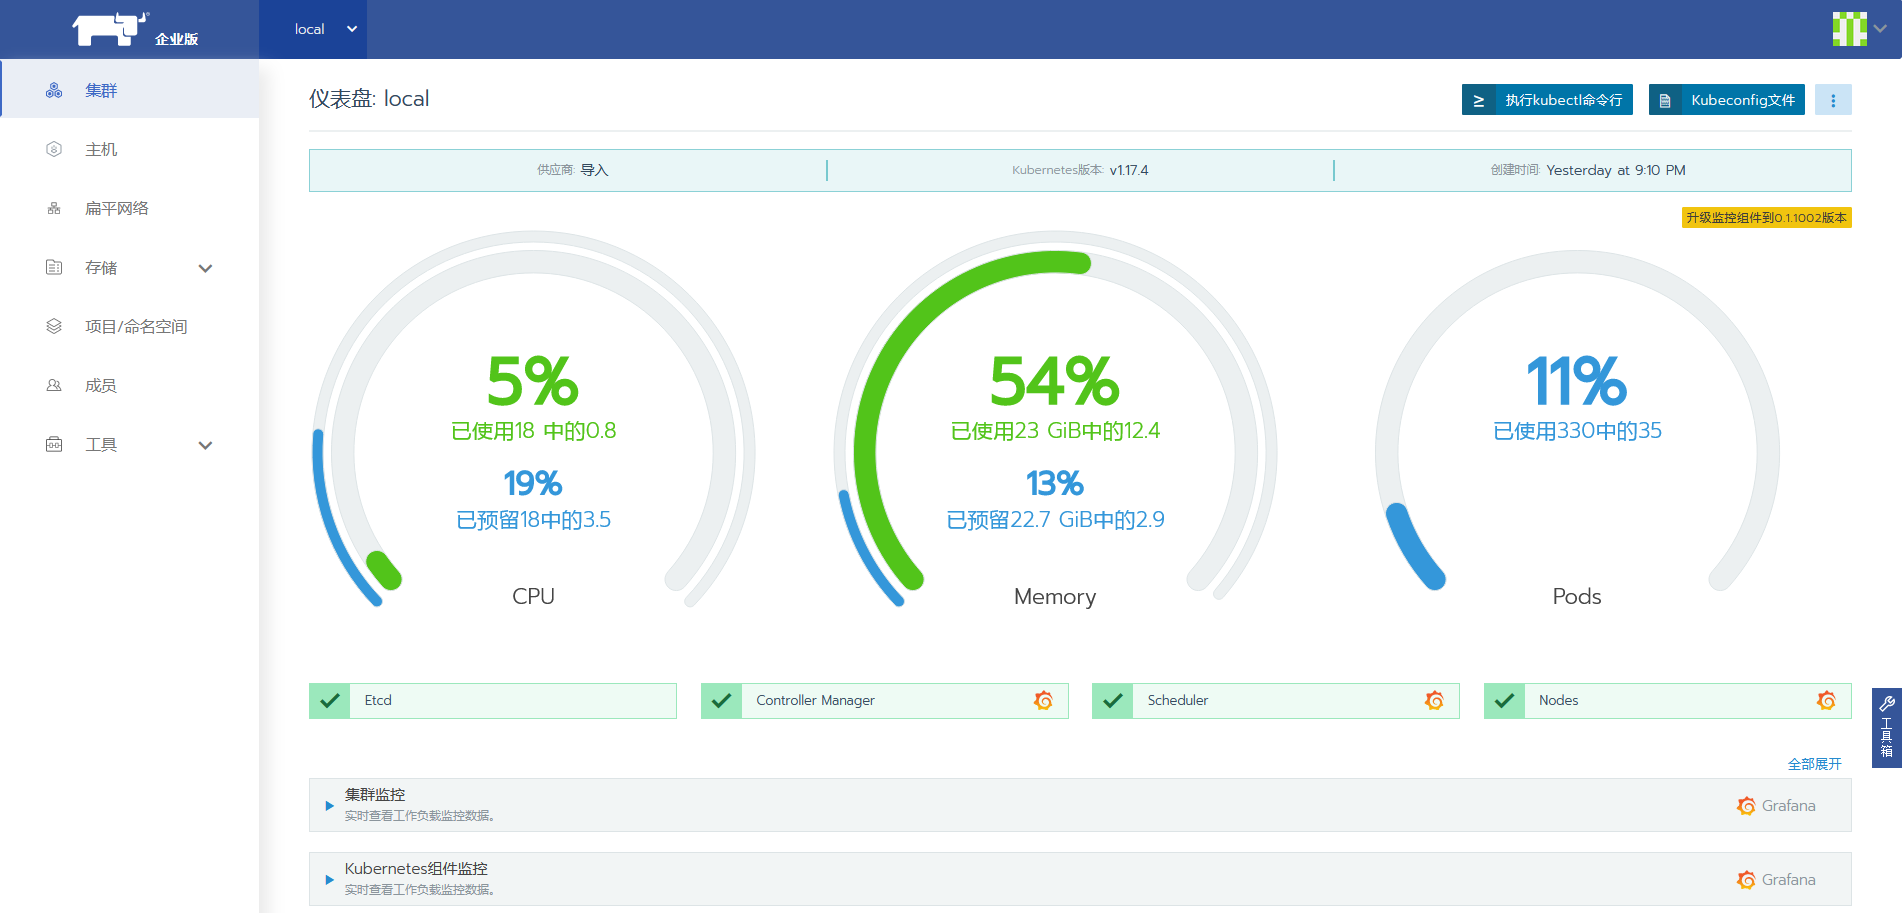
可以看到,监控已成功启动。在仪表盘下方即可查看集群实时负载信息
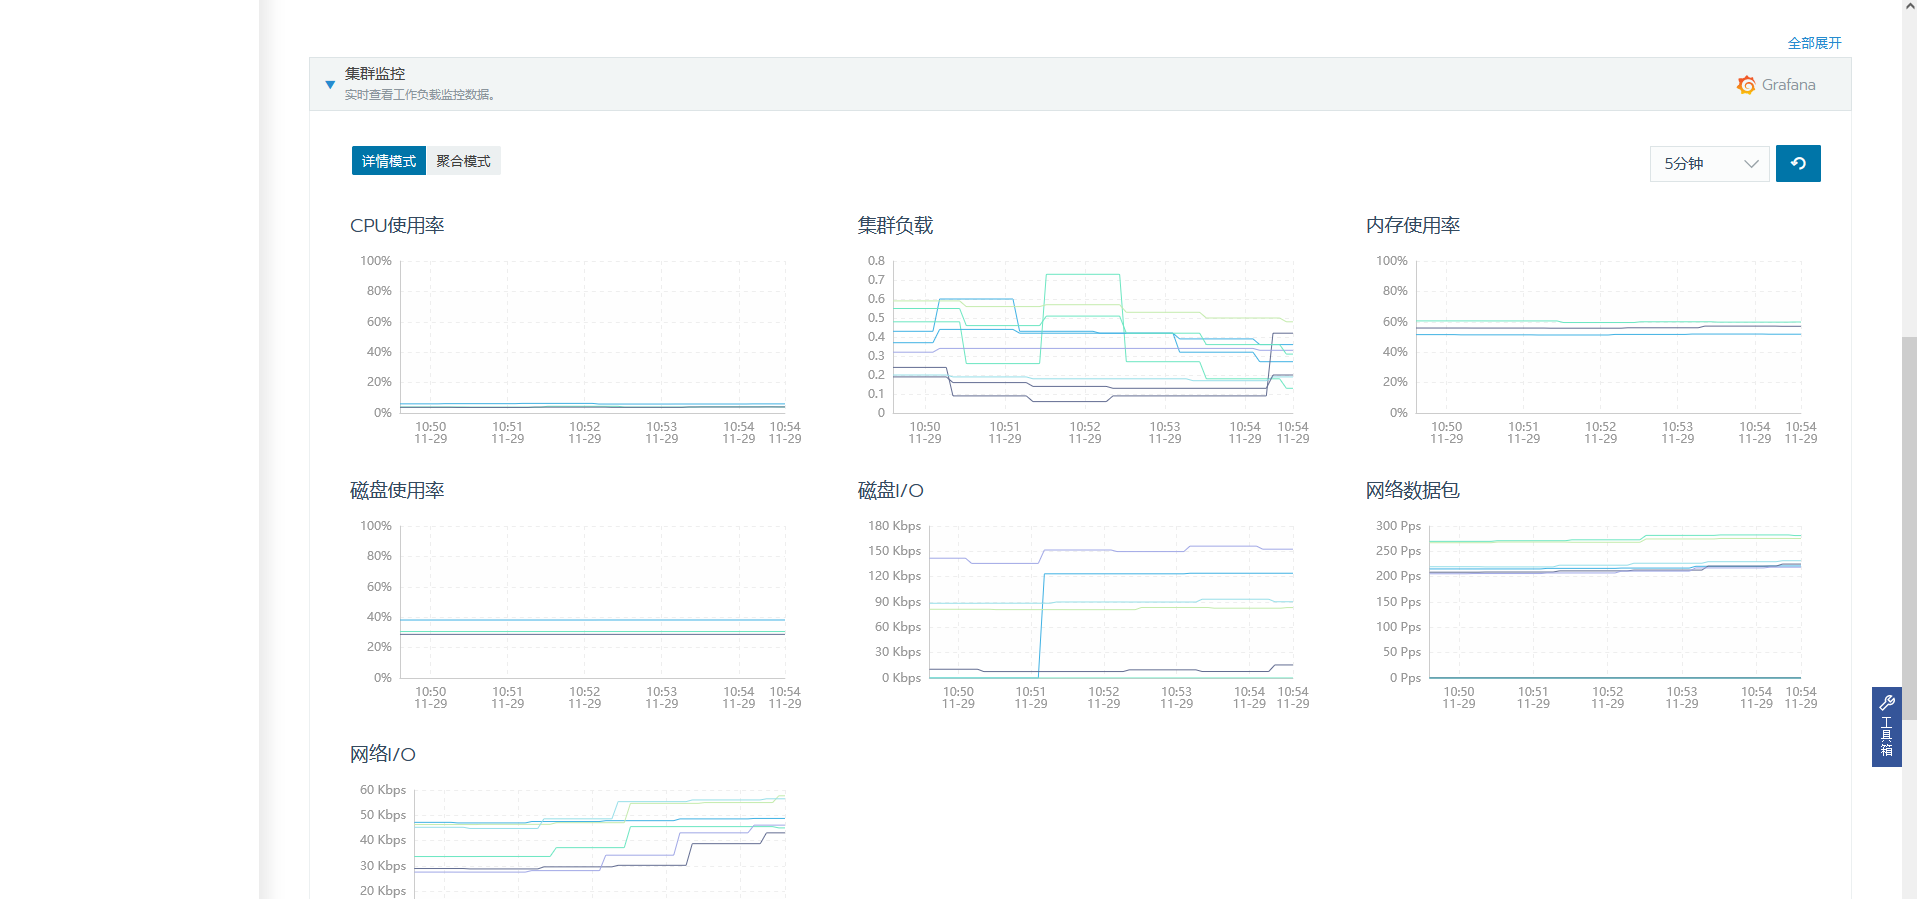
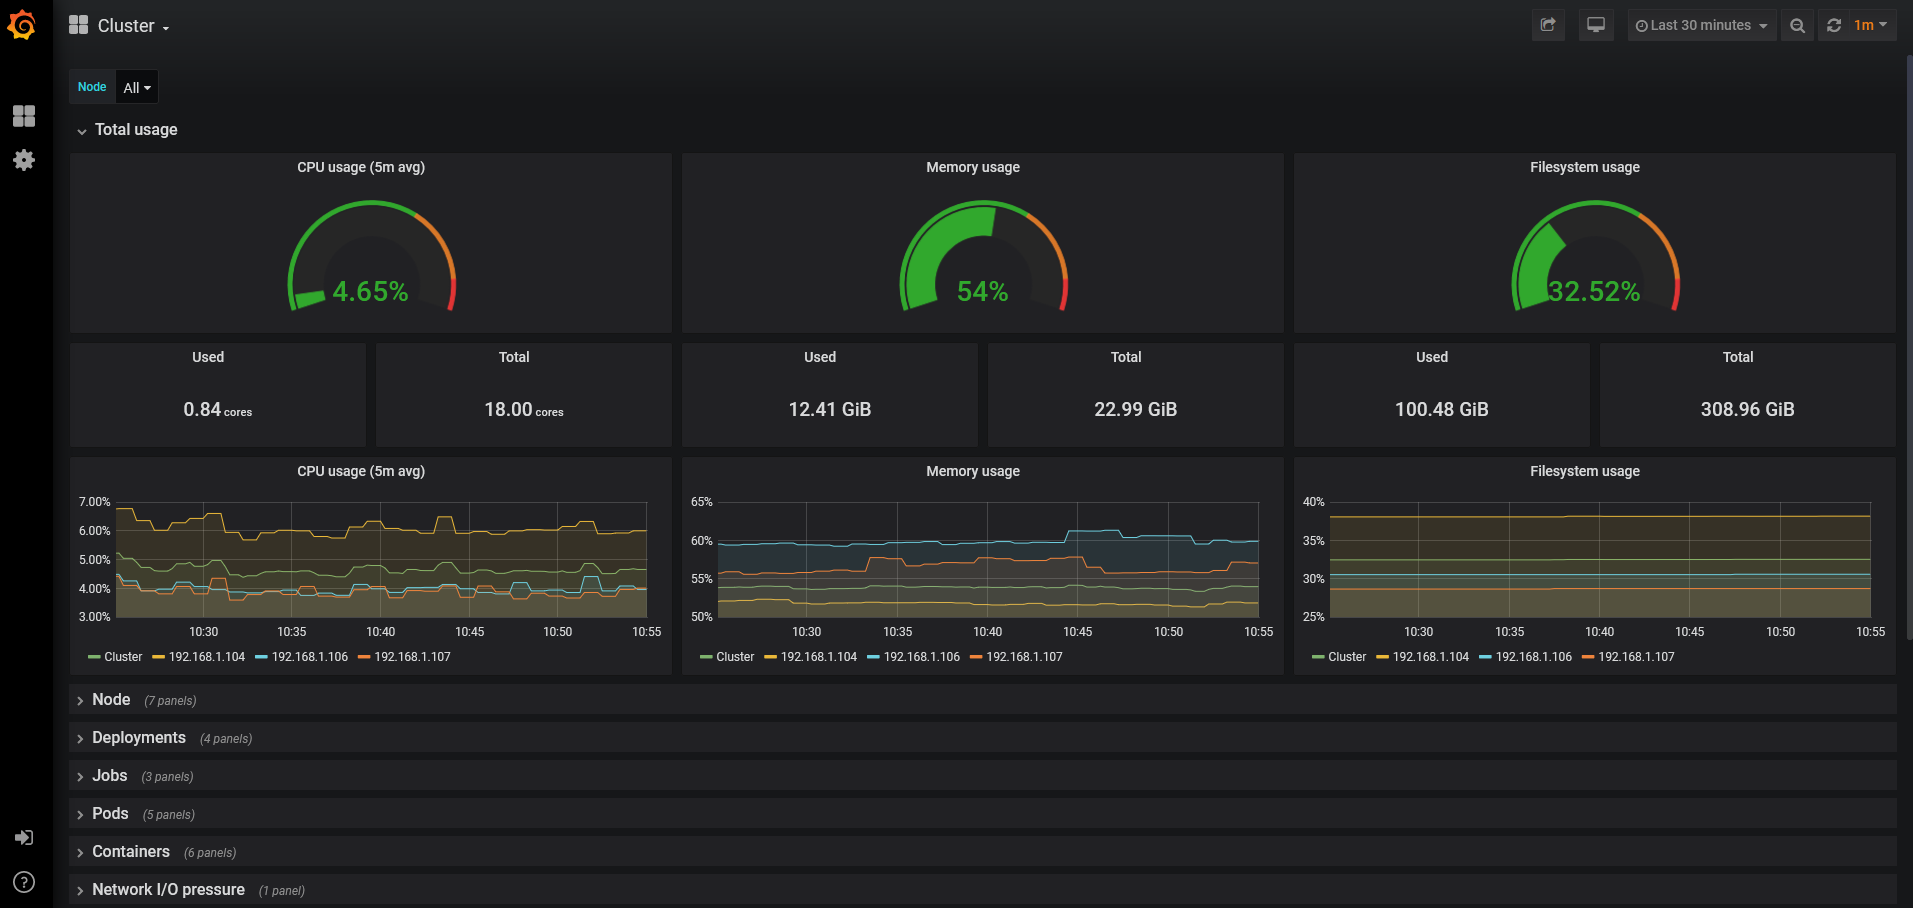
此时grafana监控也启动了,可以查看集群监控
# (7)开启日志
Rancher 支持两种层面的应用日志收集:
① 集群层面:在集群层面对接日志系统后,它将收集整个集群下全部项目 的应用日志;
② 项目层面:在项目层面对接日志系统后,它将收集本项目下应用日志。
- 修改内核参数
[root@cicd ~]# vi /etc/sysctl.conf
vm.max_map_count=26214
[root@cicd ~]# sysctl -p
vm.max_map_count = 26214
启动 Elasticsearch
在cicd节点启动Elasticsearch
[root@cicd ~]# docker run -td -p 9200:9200 -p 9300:9300 \
-v /opt/data/elasticsearch/esdata:/usr/share/elasticsearch/data \
-e "discovery.type=single-node" \
elasticsearch
- 启动 Kibana
在cicd节点启动Kibana(10.18.5.14 为harbor节点IP)
[root@cicd ~]# docker run --name some-kibana \
-e ELASTICSEARCH_URL=http://10.18.5.14:9200 \
-p 5601:5601 -d kibana
- Rancher 对接 Elasticsearch
登录Rancher仪表盘界面,选择“工具→日志”菜单命令, 日志可以基于集群层面,也可以基于项目层面。
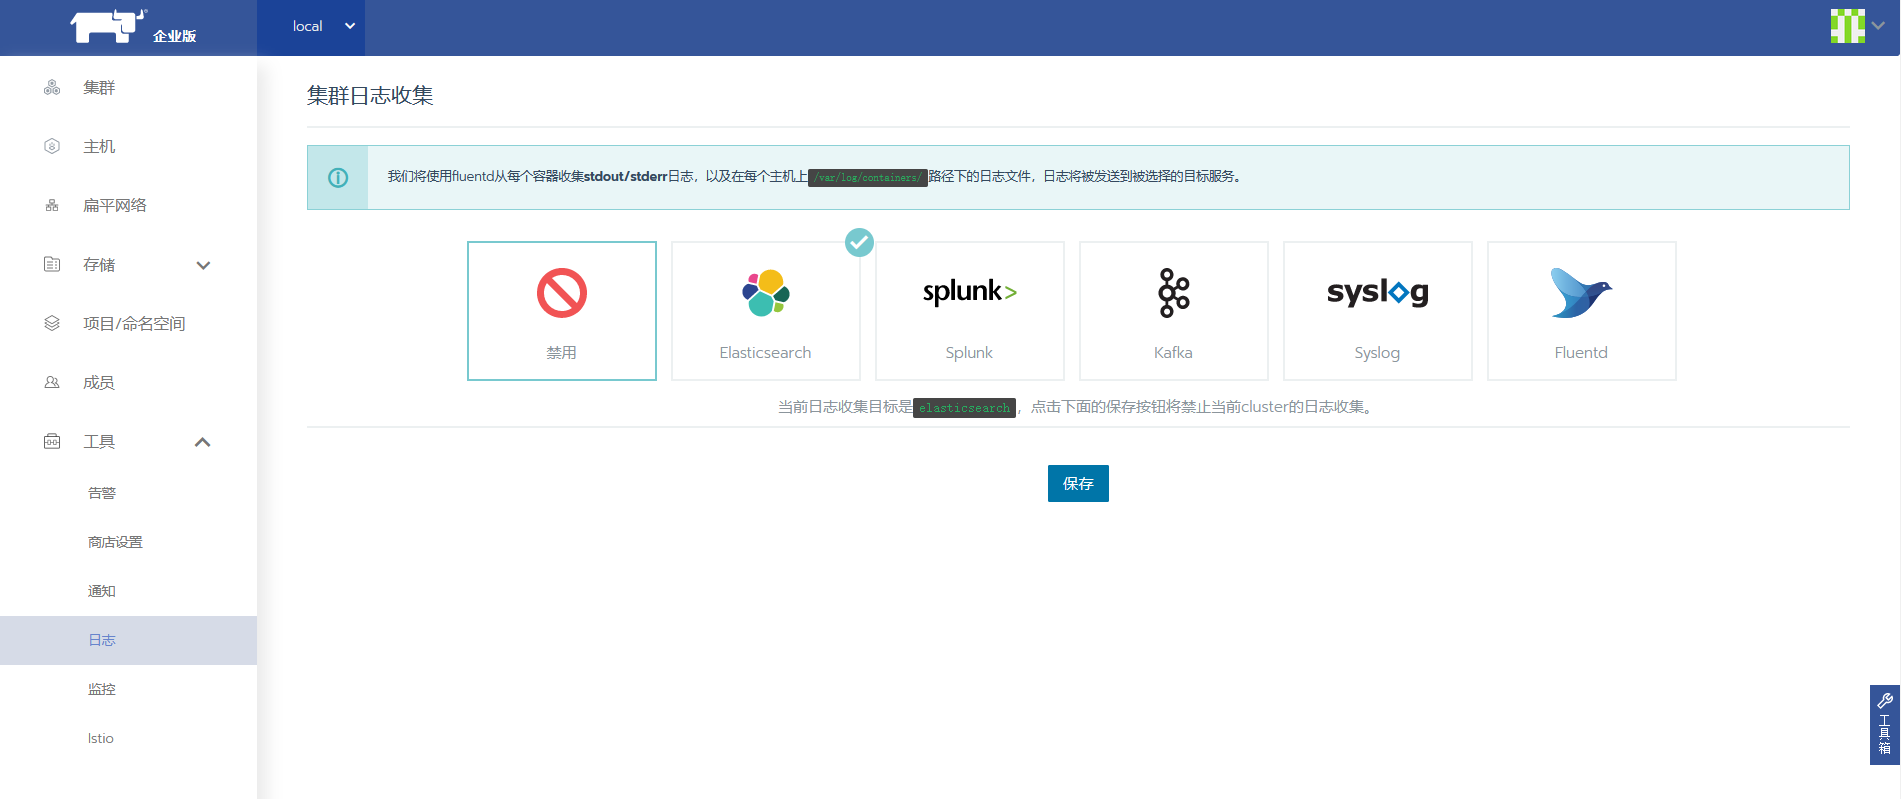
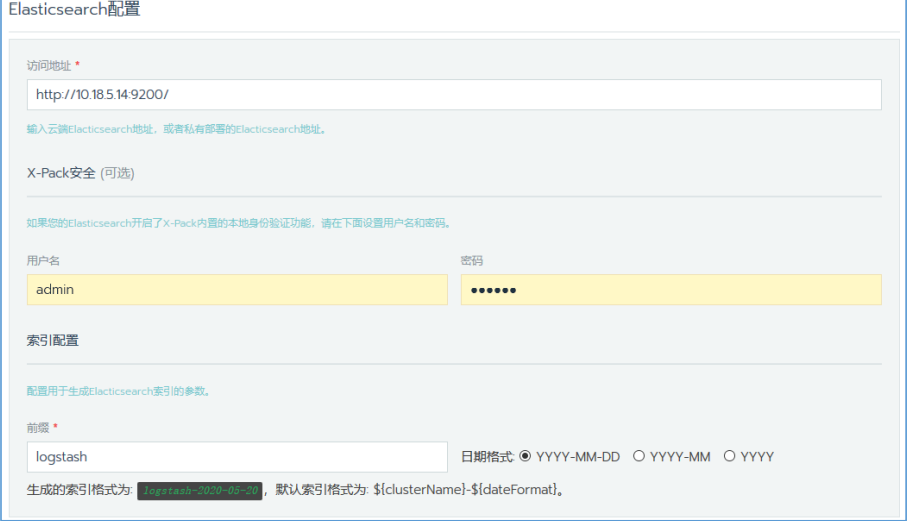
在图中单击“Elasticsearch”按钮,设置访问地址和前缀
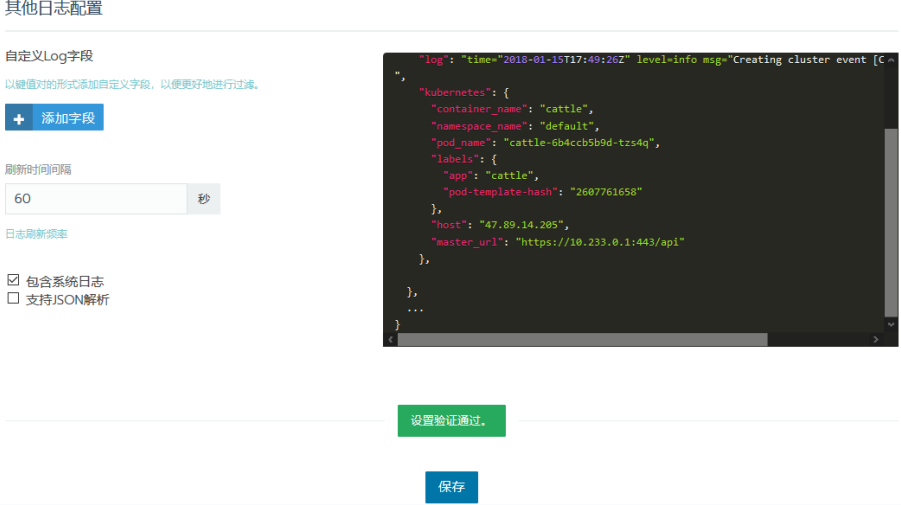
滑到底部,单击“测试”按钮,进行测试,测试结果如图所示。如 果通过则进行保存。
- 查看日志
登录 Kibana(http://10.18.5.14:5601),在 Index pattern 处输入日志前缀 “logstash-*”进行过滤,如图所示。Time Filter field name 的下拉菜单选 项选择“I don't want to use the Time Filter.”。

单击“create”按钮,跳转至过滤后的日志页面
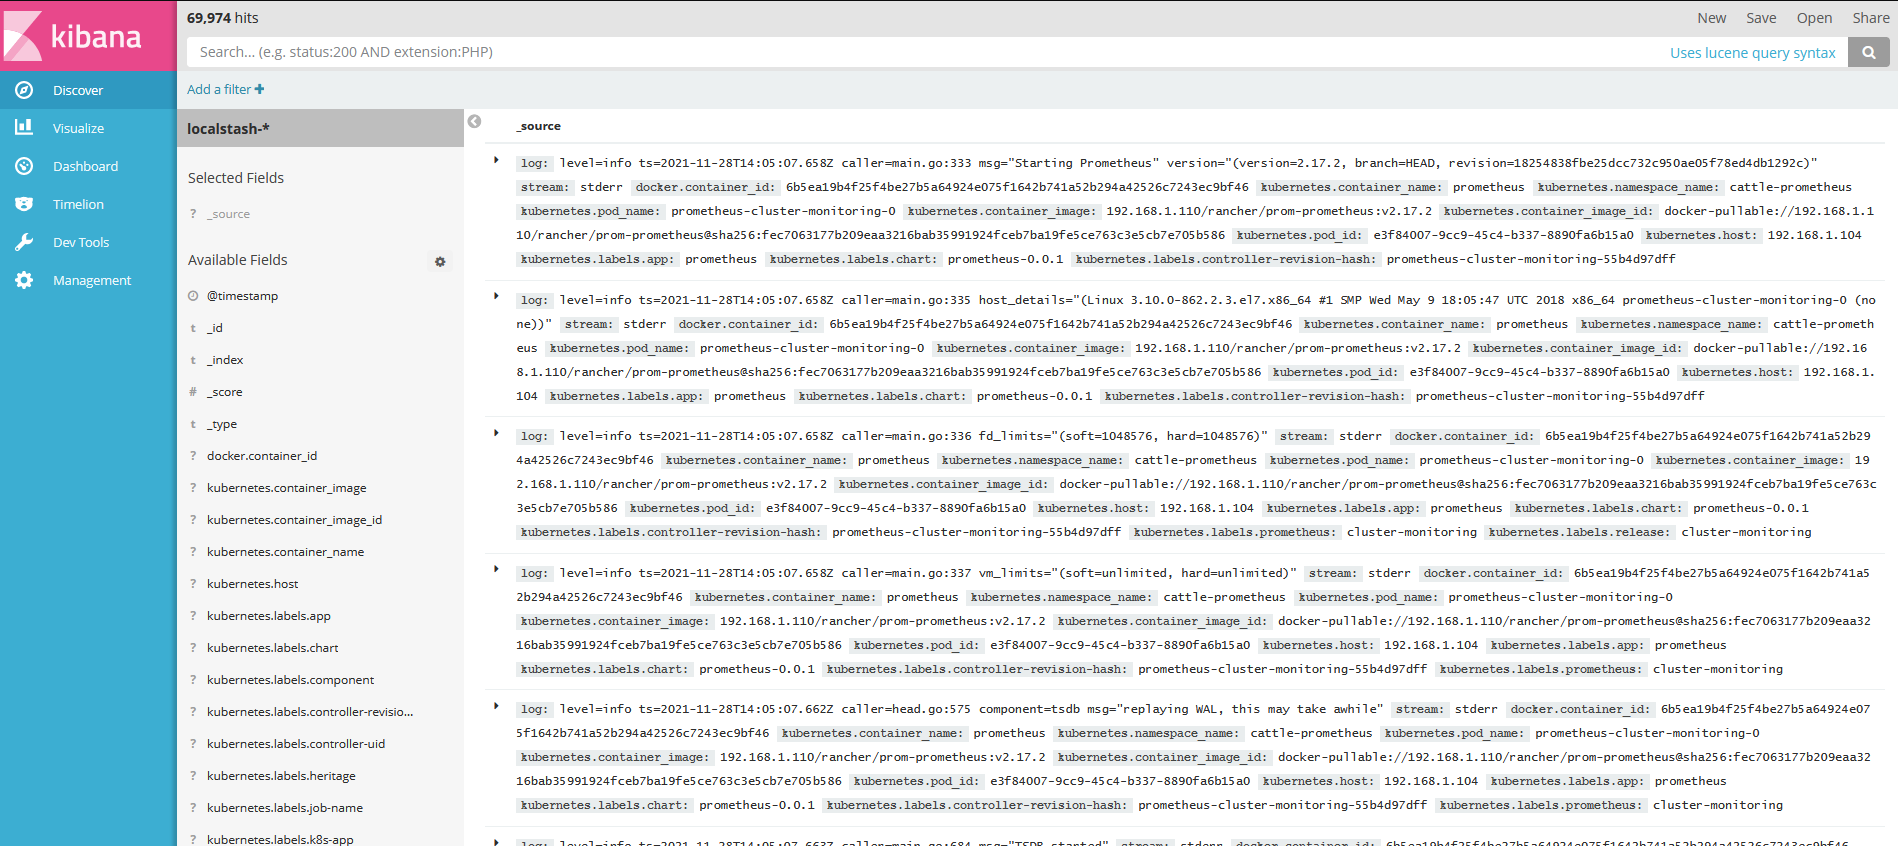
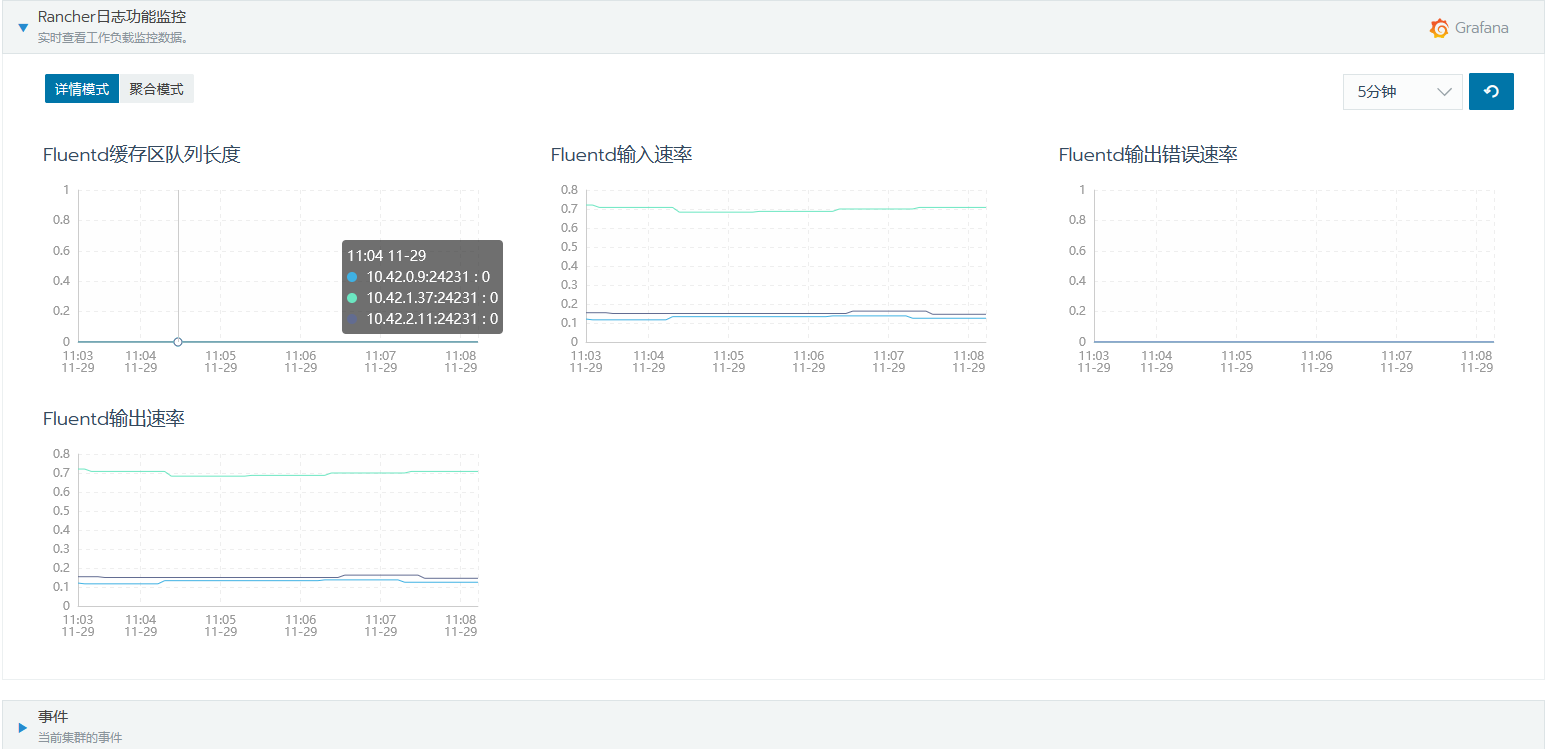
在 Rancher 集群仪表盘界面下方单击“Rancher 日志功能监控”按钮,可以 查看
